Playback Panel
Overview
Viewing video from the selected camera is possible in Playback and Live modes:
- Playback, to review recorded video footage from the camera(-s) in the View Grid
- Live, to view the live stream directly from the camera(-s) in the View Grid
To switch to video playback mode:
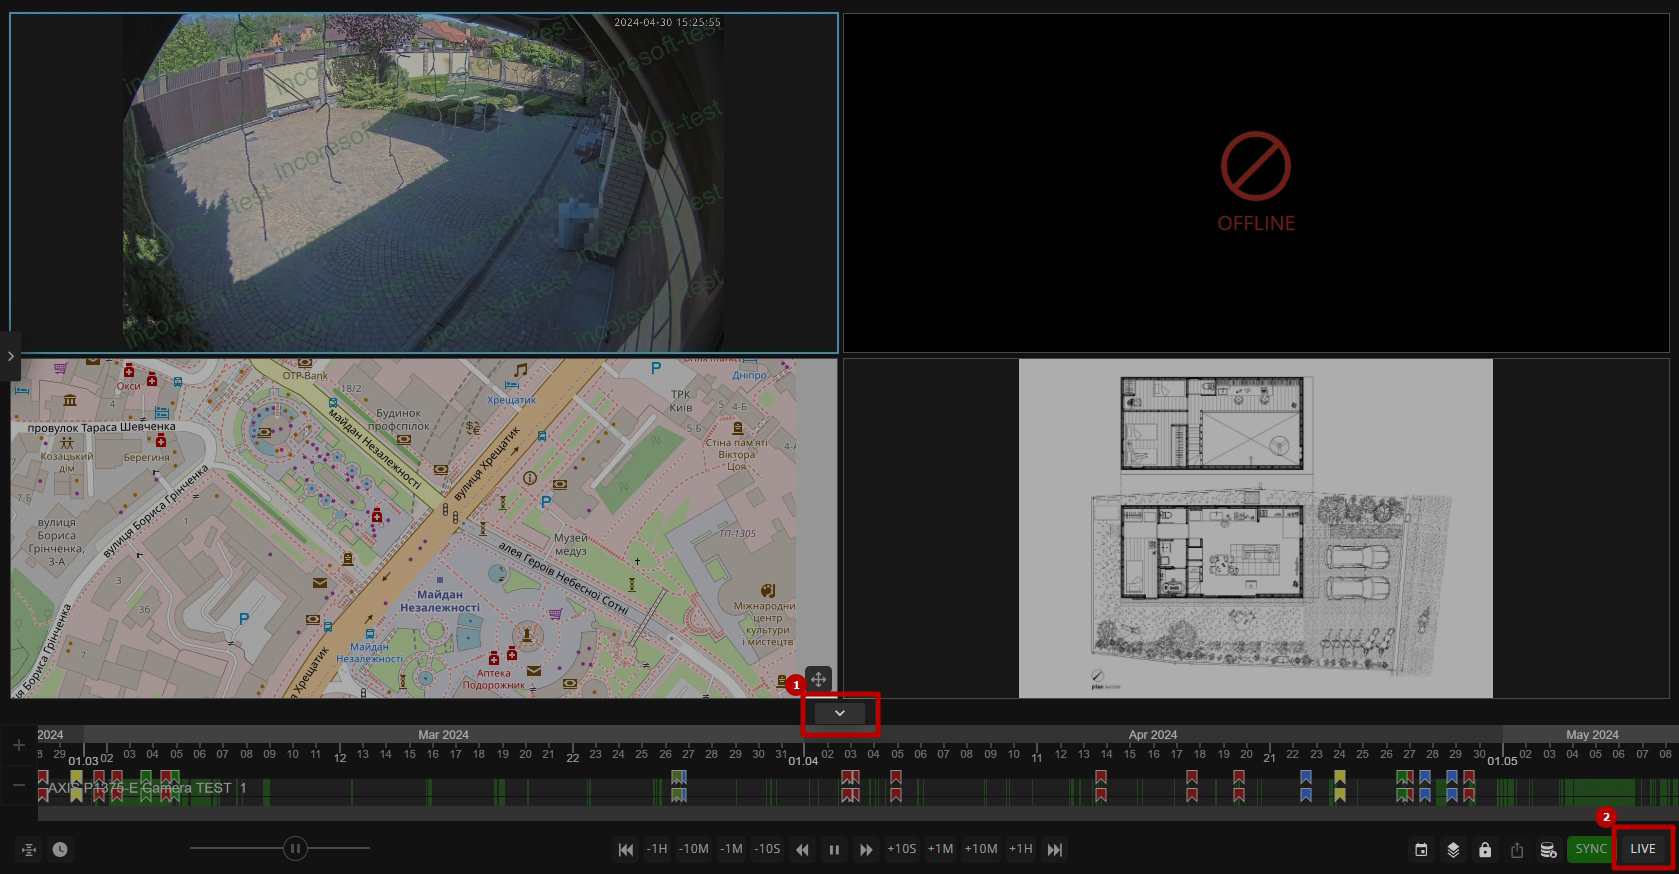
- Expand the Playback Panel by clicking the arrow button at the bottom of the View Grid, revealing recording playback controls
- Click the Live button in the Playback Panel to switch from Live to Playback mode
- To switch back to the live mode, click the Live button again. The Live button's color indicates the current displaying mode:
- Green for live stream viewing
- Grey for viewing recording playback
- To collapse the Playback Panel, click the arrow button at the bottom of the View Grid again, revealing a clean interface for live video monitoring.
Use and Functionality
The Playback Panel interface comprises:

- Timeline with navigation controls for smooth moving across the video record
- Interval parameters to select the required time frames for the video record segment
- Speed slider to manually manage the video playback speed
- Playback control buttons to manipulate the video playback
- Additional options to manage the video
Timeline
The timeline features allow to:
- View recorded video sequences:
- On the top track for the selected camera displayed in the View Grid
- On the bottom track for all cameras displayed in the View Grid
- Set the time marker at any desired date and time on the track to play the video from that specific moment
- Zoom in and out the date and time segments:
- Use the mouse wheel to scroll over the timeline
- Use the "+" and "-" buttons to the left of the timeline
- Navigate through the entire video recording:
- Move the slider under the tracks
- Use Ctrl + scroll the mouse wheel over the timeline
- Set the bookmark:
- Right-click the desired place on the track
- Select the Add Bookmark option from the context menu
- If the time marker is placed on a track segment without a recorded sequence, it will automatically jump to the nearest sequence on the track.
- The recorded video sequences are highlighted with the green color on the track, while segments without video records remain gray.
Interval Parameters
Choose your desired time interval on the timeline using the methods below:
- Manual Selection: Click the Set Interval button to activate the highlighted area on the timeline:
- Hold and drag the edges of the highlighted area to adjust its width
- Hold and drag the handles of the highlighted area edges to move the selected time interval across the timeline keeping its width
- Hold and drag the mouse cursor across the timeline to manually select a time interval
- Exact Date and Time Selection: Click the Interval Start/End Time button to open the interval calendar:
- Choose the start and end dates
- Select the desired start and end time in hours and minutes
- The start and end date and time in the calendar automatically adjust to the selected time frame on the timeline.
- The highlighted time interval's edges on the timeline automatically move according to the start and end date and time selected in the interval calendar.
The time interval on the timeline is used to select video segments recorded during the specified period from all cameras currently displayed in the View Grid. Upon clicking the Export button, all video segments within the chosen time frame will be added to the Export List, which opens in a new Export tab.
To export video segments from only specific cameras rather than all cameras within the View Grid:
- Set the time interval manually or by settings exact date and time
- Hover the mouse over the required camera cell in the View Grid
- Click the green Exclude Camera from Export Selection button, located in the upper right corner of each camera cell
Speed Slider
Adjust the playback speed manually using the speed slider:
- Hold and drag the slider to the left to play the video in reverse at the desired speed
- Hold and drag the slider to the right to play the video forward at the desired speed
- Release the slider to return to:
- 1x speed if the video is playing
- 0x speed if the video is paused
While the video is playing, the slider allows adjusting the playback speed to the following values:
- -1x to play the video in reverse at normal speed
- 1x to play the video forward at normal speed
- -16x, -8x, -4x, -2x for reverse playback at an increased speed
- 2x, 4x, 8x, 16x for forward playback at an increased speed
When the video is paused, the slider allows for manual adjustment of the playback speed with greater precision:
- -0.5x, -0.25x for reverse playback at a reduced speed
- 0.25x, 0.5x for forward playback at a reduced speed
- -1x to play the video in reverse at normal speed
- 1x to play the video forward at normal speed
- -4x, -2x for reverse playback at an increased speed
- 2x, 4x for forward playback at an increased speed
Playback Control Buttons
Use playback control buttons to manage the playback:
- "|<<" to jump to the previous recorded video segment
- "-1H" to rewind the recorded video segment by 1 hour
- "-10M" to rewind the recorded video segment by 10 minutes
- "-1M" to rewind the recorded video segment by 1 minute
- "-10S" to rewind the recorded video segment by 10 seconds
- "<<" for reverse playback at an increased speed (-2x, -4x, -8x, -16x)
- "Play" to start the video playback at normal speed
- "Pause" to stop video playback
- ">>" for forward playback at an increased speed (2x, 4x, 8x, 16x)
- "+10S" to fast-forward the recorded video segment by 10 seconds
- "+1M" to fast-forward the recorded video segment by 1 minute
- "+10M" to fast-forward the recorded video segment by 10 minutes
- "+1H" to fast-forward the recorded video segment by 1 hour
- ">>|" to jump to the next recorded video segment
Additional Options
The additional options on the Playback Panel include:
- Show Calendar, to select the desired time frames to display on the timeline
- Show Layers, to enable/disable the display of bookmarks and plugin markers on the timeline by selecting the respective icon in the context menu
- Protect Archive, to safeguard a specific segment of the video captured by required cameras, preventing its automatic deletion. In the Protect Archive pop-up window:
- Select multiple required cameras from the Camera parameter. In the Select Cameras pop-up window:
- Check the boxes next to the required cameras and folders
- Click the Confirm button
- Enter the archive title and description
- Select the start and end date and time from the calendar to protect the video recording within these time frames
- Select the date and time until which the archive will be kept protected
- Click the Confirm button
- Select multiple required cameras from the Camera parameter. In the Select Cameras pop-up window:
- Export, to add the selected time interval to the export list in the Export tab
- Protected Archive List, to view and manage protected archives
- Sync, to synchronize the time for all cameras displayed in the View Grid
- Live, to switch between Live and Playback modes
- The Export option is enabled only upon selecting the time interval on the timeline. If the time interval is not selected, the button becomes disabled.
- The Pin icon in the Show Calendar option allows you to pin the calendar display on top of the Playback Panel. If the calendar is pinned, it will remain open even when using other features from the panel. To unpin the calendar, just click the Pin icon again.
The Protected Archive List pop-up window comprises:

- Filters to quickly find the desired protected archive by:
- Related cameras
- Protected time interval
- Archive keeping expiration date
- Table with a list of protected archives which comprises:
- Archive title
- Start and end protected recording time
- Archive keeping expiration date
- Name of the user who protected the archive
- Archive description
- Toolbox options:
- Open Playback: Launch all related cameras in a new Layout tab for playback
- Edit Archive: Modify the required protected archive parameters
- Add to Export List: Add all video segments from the protected archive to the export list in the Export tab
- Delete Archive: Remove the required protected archive