Cameras
This page comprises the Cameras section overview and functionality description.
Overview
To access cameras, open the Cameras section in the Resource Tree:

Use and Functionality
The Cameras section's functional menu allows to:
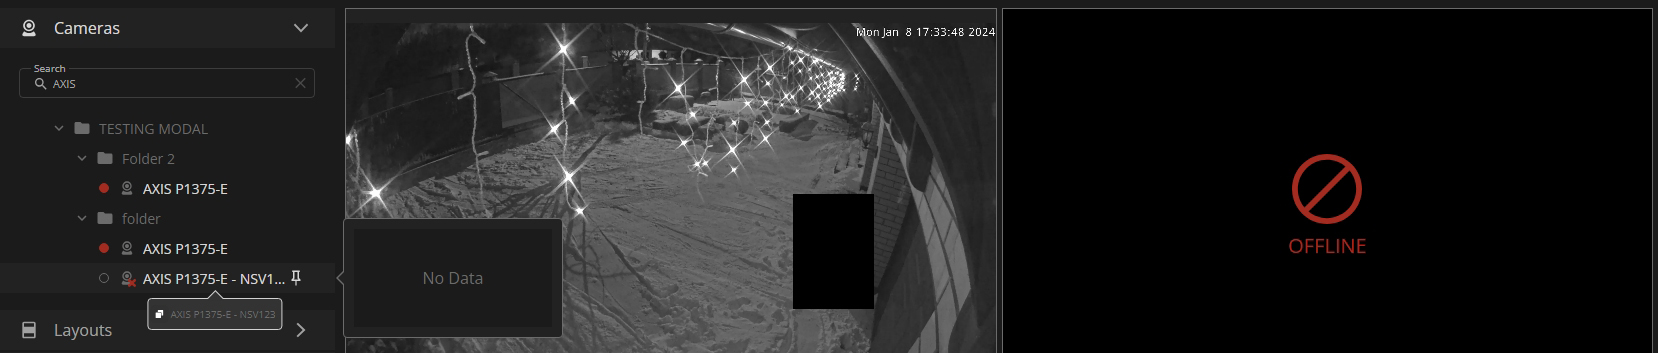
- Filter cameras and camera groups:
- Enter the camera/camera group name or characters in the name in the Search field to filter cameras and camera groups
- Click the "X" icon or manually remove the text from the Search field to cancel filtering
- View the list of available cameras and camera groups
- Check the status of the required camera:
- The clear Camera icon without indicators confirms that the camera is online.
- The red Lock indicator over the Camera icon signifies that access to the required camera is denied for the current user.
- The red X indicator over the camera icon indicates that the camera is offline or an error has occurred.
- View the video recording status to the left of the Camera icon:
- The red circle indicates that the video is recording.
- The empty circle denotes that the video is not recording.
- Pin frequently used cameras at the top of the group for quick access:
- Hover the mouse over the desired camera
- Click the Pin icon
- View the video frame thumbnail by hovering the mouse cursor over the desired camera
- Display the camera video in the View Grid:
- Hold and drag the desired camera to the required cell in the View Grid if the required layout has already been selected
- Double-click the desired camera to automatically open it in an empty cell in the View Grid or add an additional cell in the layout
Hover the mouse cursor over the camera name that doesn't fit the list to read it in full in the tooltip. Click the Copy icon within the tooltip to copy the required camera name to the clipboard.