Layouts
Overview
To access admin layouts, select the Layouts item in the main menu:

Use and Functionality
The Layouts item shows all layouts and layout groups created by administrators in the Admin Center, including such layout elements as cameras, maps, and plans. The item's functional menu allows to:
- Enter the layout or layout element name or characters in the name in the Layout/Element Name search field to filter layouts and their elements
- Sort layouts by:
- Newest first
- Oldest first
- Name (A-Z)
- Name (Z-A)
- Click the grey Create Group button to create a new group within the selected one, or inside the root group if no group was selected
- Right-click anywhere in the empty space, and in the drop-down menu:
- Create a new layout
- Create a new layout group
- Right-click the group name, and in the drop-down menu:
- Create a new layout within this group
- Create a subgroup within it
- Rename the group
- Copy the group to the clipboard
- Paste the group or layout (enabled only if the group or layout has already been copied to the clipboard)
- Delete the group
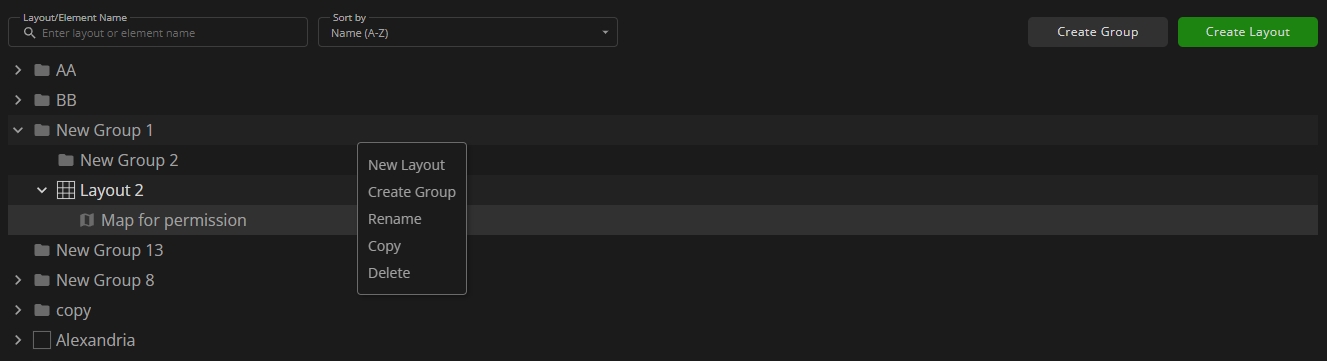
- Right-click the layout name, and in the drop-down menu:
- Edit the layout
- Rename the layout
- Copy the layout to the same group
- Move the layout to another group
- Delete the layout
- The layout editor can also be opened by double-clicking the layout name.
- The group containing layout groups, layouts, and layout elements cannot be deleted. First, delete the items within the group, and then proceed to delete the group itself.
Create New Layout
To create a new layout, click the green Create Layout button:

The Create Layout pop-up window comprises 3 tabs:
- What
- Where
- For
Standard Layout
To create a Standard layout, in the Create Layout pop-up window proceed with the following steps:
In the What tab:
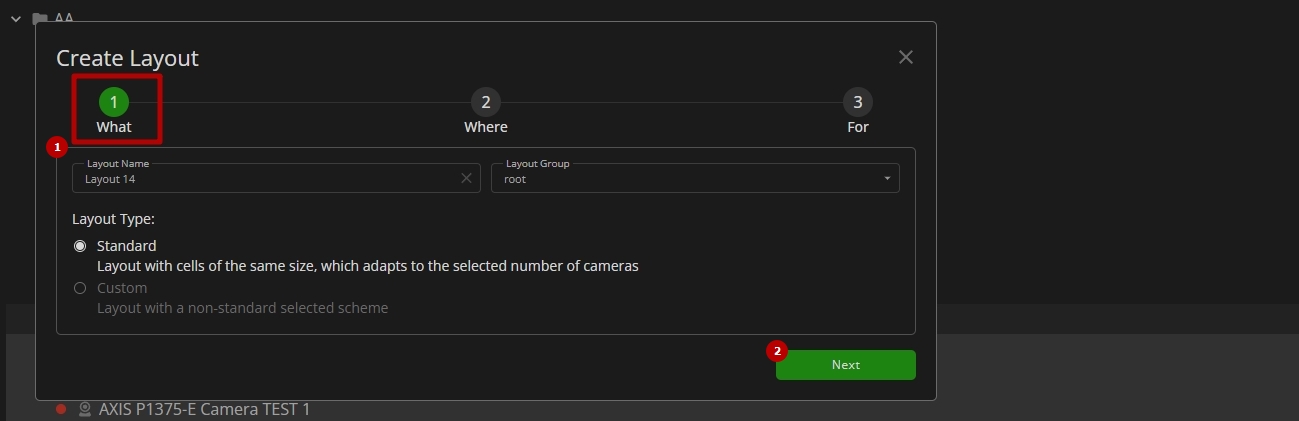
- Configure general layout parameters:
- Enter the layout name
- Select a group from a drop-down list to place the layout
- Select the Standard layout type with cells of a similar size, which adapts to the selected number of cameras from the Where tab
- Click the Next button to proceed
In the Where tab:
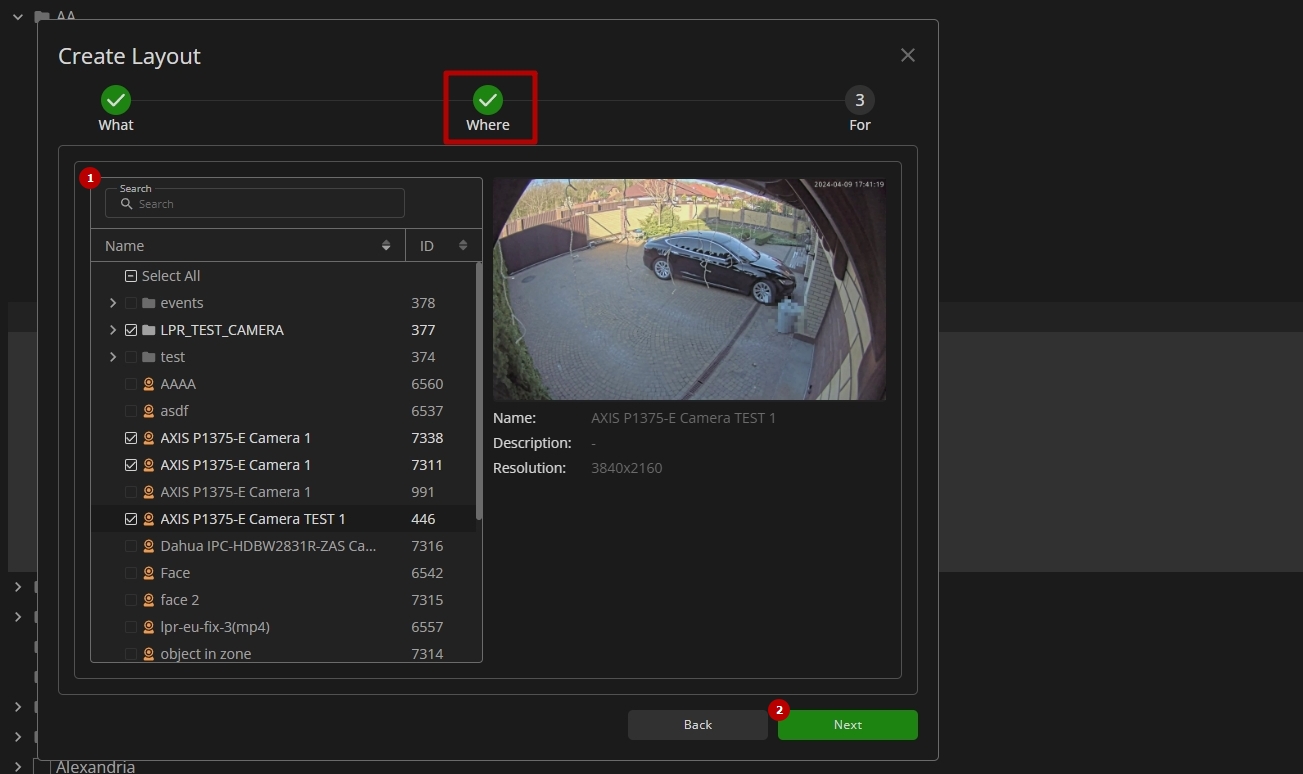
- Select multiple desired cameras:
- Fill in the Search field with:
- Camera/server name or characters in the name
- Camera/server ID
- Select the checkboxes in the list to select the required cameras and groups
- Fill in the Search field with:
- Click the Next button to proceed
In the For tab:
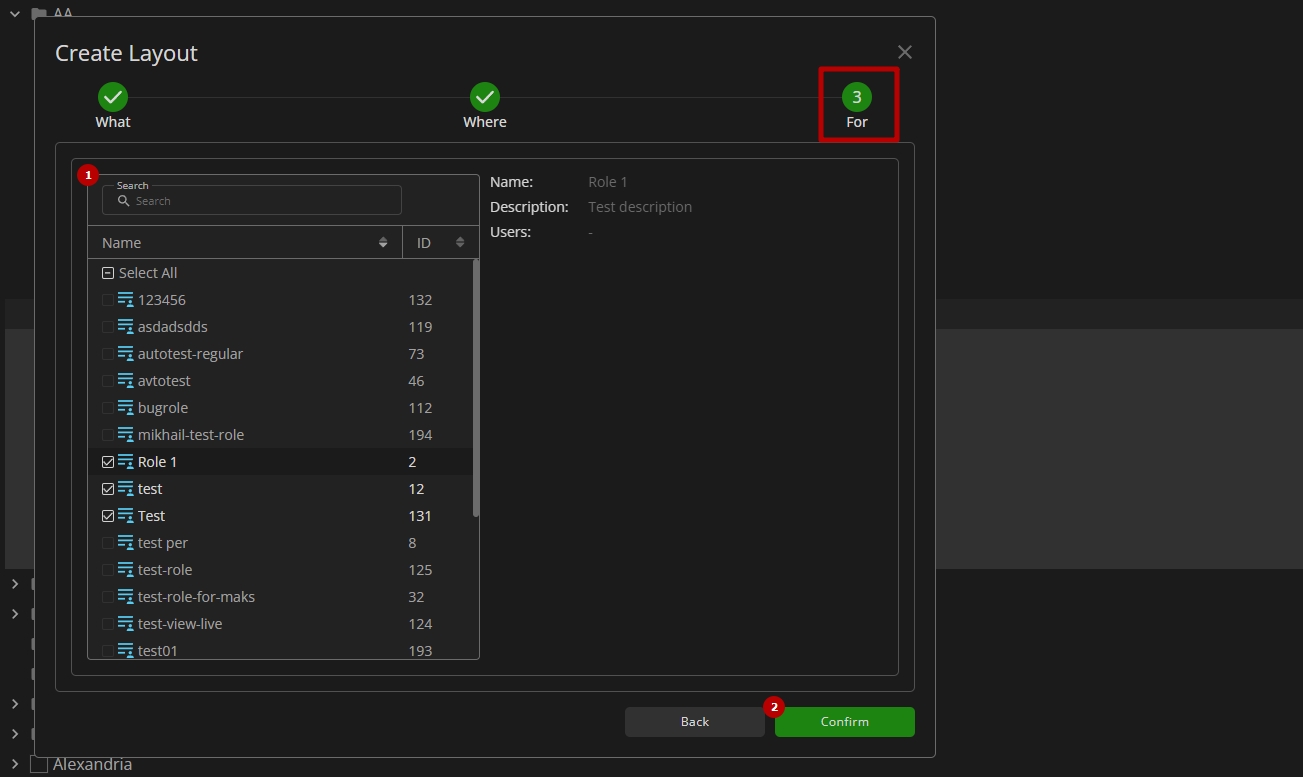
- Select multiple desired roles:
- Fill in the Search field with:
- Role name or characters in the name
- Role ID
- Select the checkboxes in the list to select the required roles
- Fill in the Search field with:
- Click the Confirm button to save the layout
Custom Layout
To create a Custom layout, in the Create Layout pop-up window proceed with the following steps:
In the What tab:
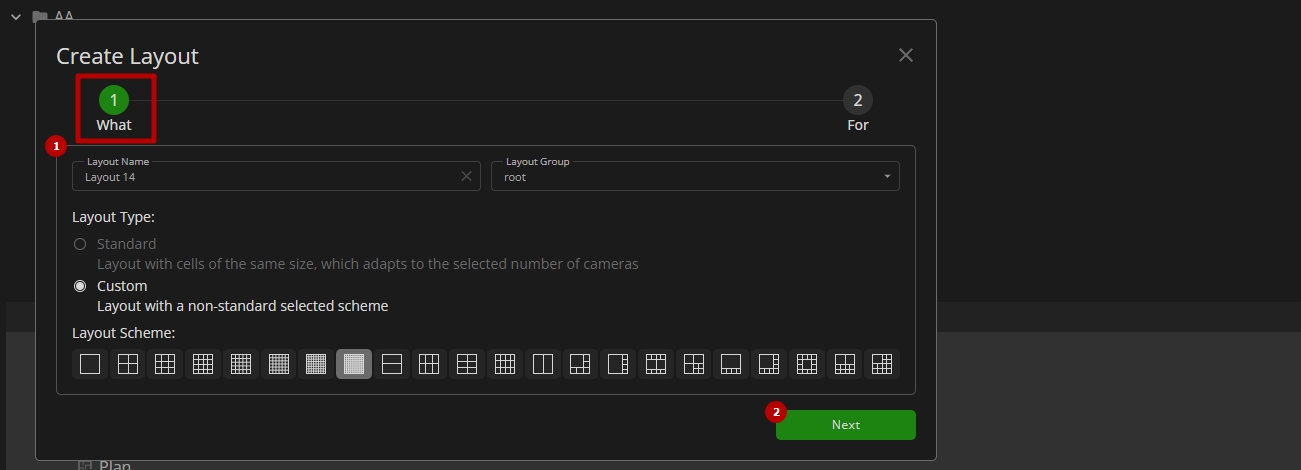
- Configure general layout parameters:
- Enter the layout name
- Select a group from a drop-down list to place the layout
- Select the Custom layout type with a non-standard scheme
- Select the desired layout scheme
- Click the Next button to proceed
In the For tab:
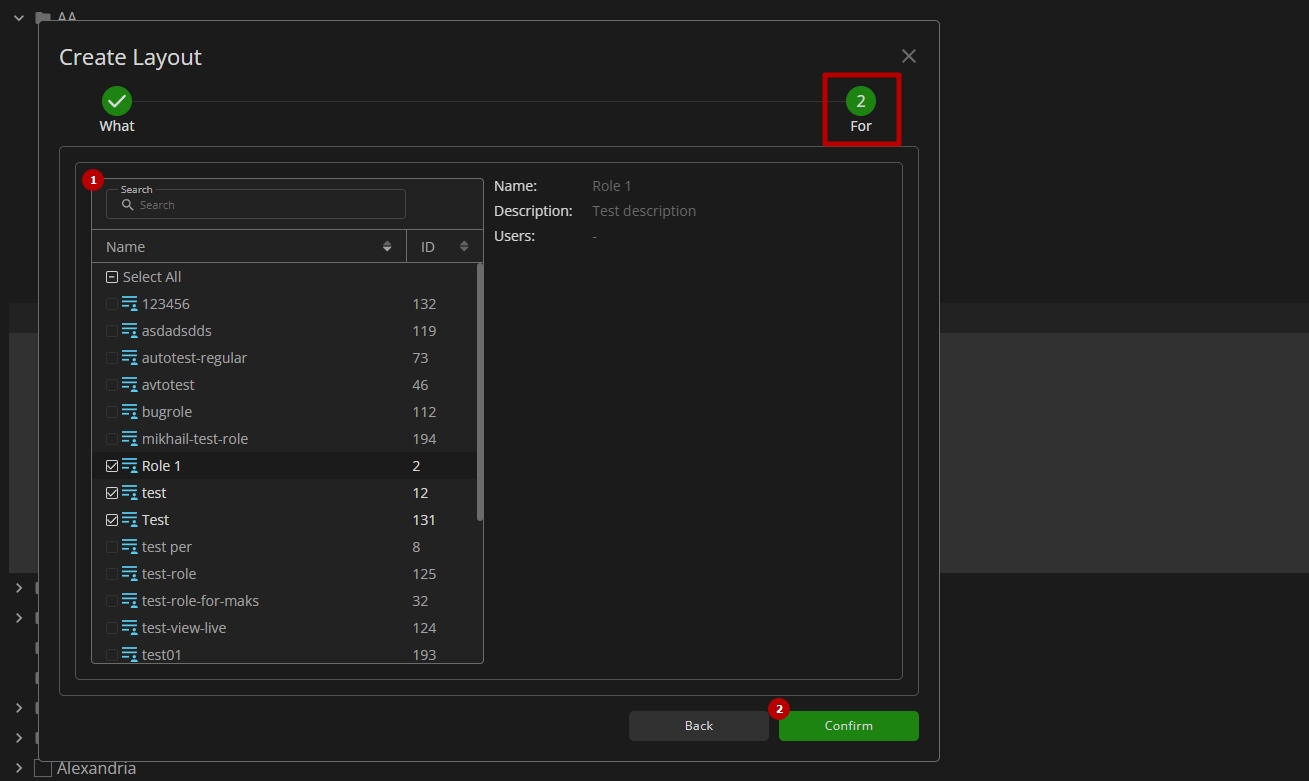
- Select multiple desired roles:
- Fill in the Search field with:
- Role name or characters in the name
- Role ID
- Select the checkboxes in the list to select the required roles
- Fill in the Search field with:
- Click the Confirm button to save the layout
Edit Layout
To view and edit the required layout, double-click the layout name. The layout editor interface comprises the following elements:
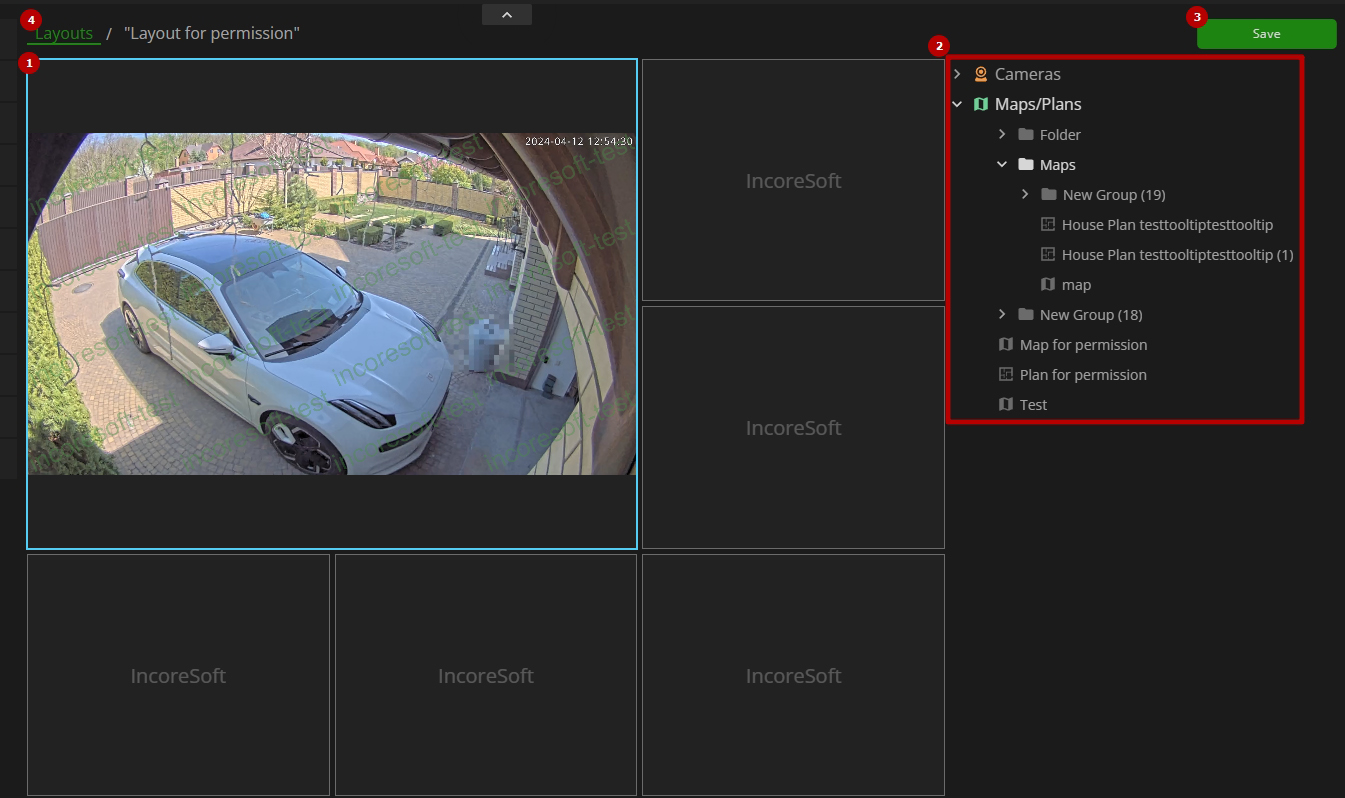
- Layout cells arranged according to a selected standard or custom scheme
- Expandable sidebar featuring elements for layout:
- Cameras
- Maps
- Plans
- Confirmation button to save the changes
- Return button to navigate back to the Layouts item
- Hover the mouse over the desired camera or plan to see its preview.
- Hold and drag the desired element from the list to the required cell to place it in the layout.
- Refer to the View Grid documentation to learn more about camera, map, and plan management options.