Alarm Rules
Overview
To access alarm rules, select the Alarm Rules item in the main menu:

Use and Functionality
The Alarm Rules functional menu allows to:

- Enter the rule group or rule name or characters in the name to filter by rules and rule groups
- Select multiple required alarm types from the drop-down list:
- Generic Alarm
- Camera Disconnected
- Input State Change
- License Issue
- Server Failure
- Server Started
- Select multiple required sources. In the Select Source pop-up window:
- Check the boxes next to the required sources and folders
- Click the Confirm button
Once selected and filtered, see the rules and rule groups in the table below. It contains:

- Rule and rule group ID
- Rule and rule group name
- Alarm type
- Source name
- Selected action:
- Start Camera Recording
- Send HTTP Request
- Execute PTZ Preset
- Open Layout
- Play Sound
- Write to Log
- Create Bookmark
- Create Alarm
- Generate Notification
- Trigger Output
- Status toggle, which indicates whether the rule is enabled (green) or disabled (grey)
- Toolbox comprises:
- Edit Rule option
- Delete Rule/Rule Group option
- Context menu by right-clicking the rule group in the table with options to:
- Create a new rule within the selected group
- Create a new rule group within the selected one (up to 4 levels of nesting)
- Rename the selected rule group
- Collapse the selected rule group if it was expanded
- Delete the selected rule group
- Context menu by right-clicking the rule in the table with options to:
- Rename the selected rule
- Move the selected rule to another rule group
- Delete the selected rule
- Click the Create Group button to create a new rule group in the root group.
- Click the Status toggle to switch the rule status.
- Hold, and drag the rule groups to rearrange them in the table.
- Hover the mouse cursor over the required source or action name that doesn't fit in the column to read it in full in the tooltip. Click the Copy icon within the tooltip to copy the source or action name to the clipboard.
Create Rule
To create a new rule, click the Create Rule button:

The Create Rule pop-up window comprises 5 tabs:
What Tab
Configure the parameters in the What tab:
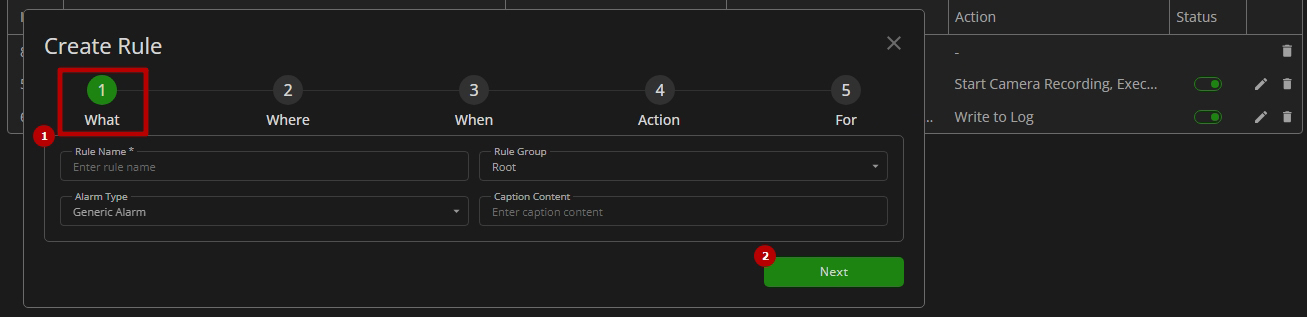
- Fill in the required fields:
- Enter the rule name
- Select the rule group
- Select the alarm type from the drop-down list:
- Generic Alarm
- Input State Change
- Camera Disconnected
- License Issue
- Server Failure
- Server Started
- Click the Next button to proceed
- The Caption Content field for the Generic Alarm type is optional, allowing users to fill it in at their discretion.
- For more information on configuring and using the Generic Alarm, refer to the How to Use Generic Alarm in the VMS? documentation.
- The License Issue alarm type is triggered whenever the license status deviates from Activation Completed. If the status changes to License Expired due to license expiration, the alarm will be generated daily at midnight until the license is deactivated.
- The Input State Change alarm type also requires the selection of input transition type:
- Active: The alarm is triggered when the input state changes from the configured normal state to the active state.
- Inactive: The alarm is triggered when the input state changes from the active state back to the configured normal state.
- Both: The alarm is triggered on any transition between the normal and active states, in either direction.
Where Tab
Select the desired camera/input/server source in the Where tab:
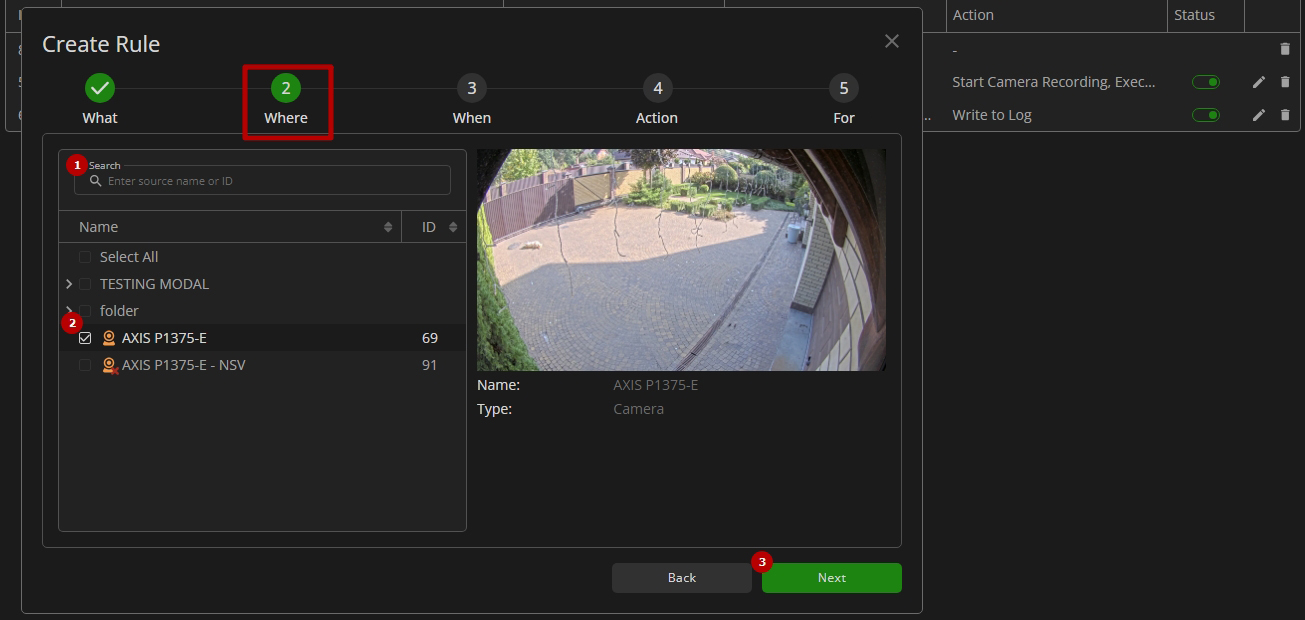
- Fill in the Search field with:
- Camera/input/server name or characters in the name
- Camera/input/server ID
- Select the checkboxes in the list to select the required cameras, inputs, and their groups, or servers
- Click the Next button to proceed
- The Where tab is disabled for the License Issue alarm type selected in the What tab.
- The Where tab displays the list of available:
- Cameras for Generic Alarm and Camera Disconnected alarm types
- Inputs for Input State Change alarm type
- Servers for Server Failure and Server Started alarm types
- At least one camera/input/server source must be selected to proceed.
When Tab
Set up the rule operation schedule in the When tab:
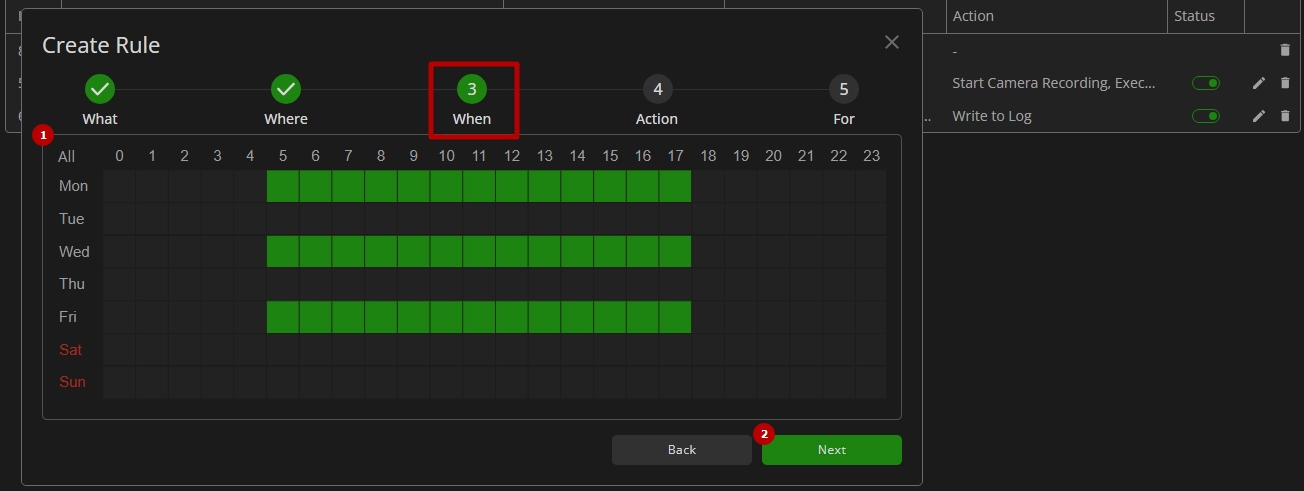
- Select/deselect the required rule operation hours for each day:
- Click the single cell to select/deselect it
- Hold and drag the mouse to select/deselect multiple cells in the required area
- Click the required hour to select/deselect the corresponding cell column
- Click the required day of the week to select/deselect the corresponding cell row
- Click the All button to select/deselect all cells in the table chart
- Click the Next button to proceed
Action Tab
Configure actions in the Action tab:
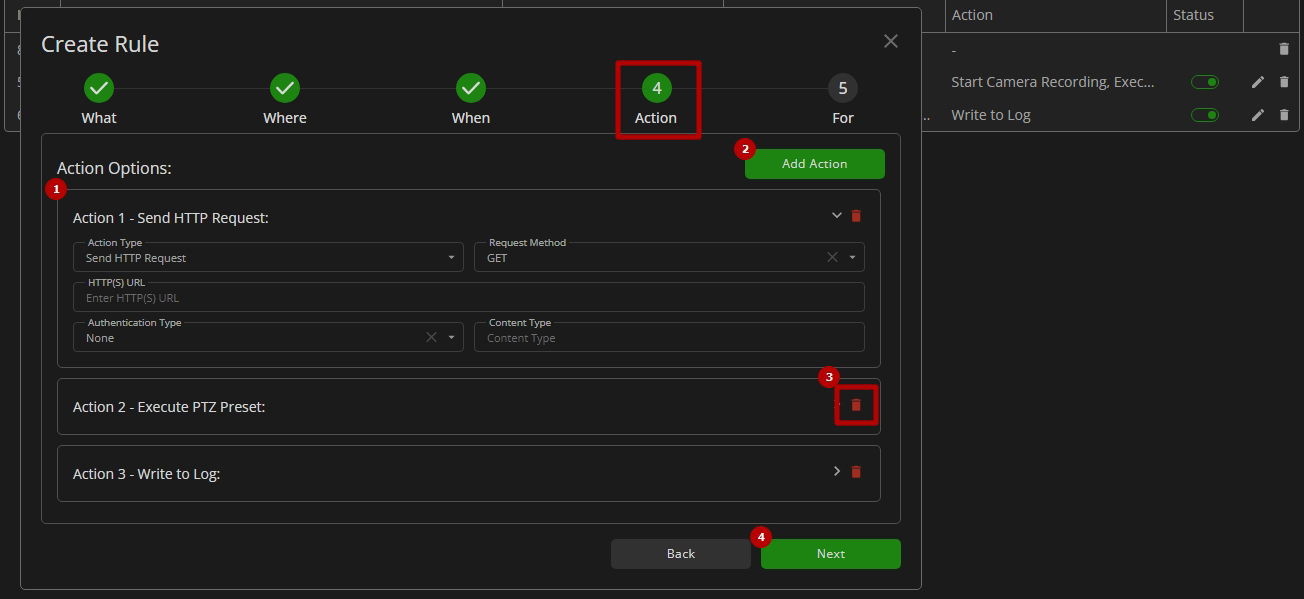
- Set action parameters:
- Select the required action type from the drop-down list:
- Start Camera Recording
- Send HTTP Request
- Execute PTZ Preset
- Open Layout
- Play Sound
- Write to Log
- Create Bookmark
- Create Alarm
- Generate Notification
- Trigger Output
- Configure the additional parameters
- Select the required action type from the drop-down list:
- Add more actions by clicking the Add Action button
- Delete the required action by clicking the red Delete icon in the expanded action block
- Click the Next button to proceed
- To learn more about each action type's additional parameters configuration, read the Action Parameters Configuration section.
- The additional parameters are available for all action types, except Write to Log.
- The red Delete icon is available only if multiple actions are added.
Action Parameters Configuration
The Start Camera Recording action type allows to:
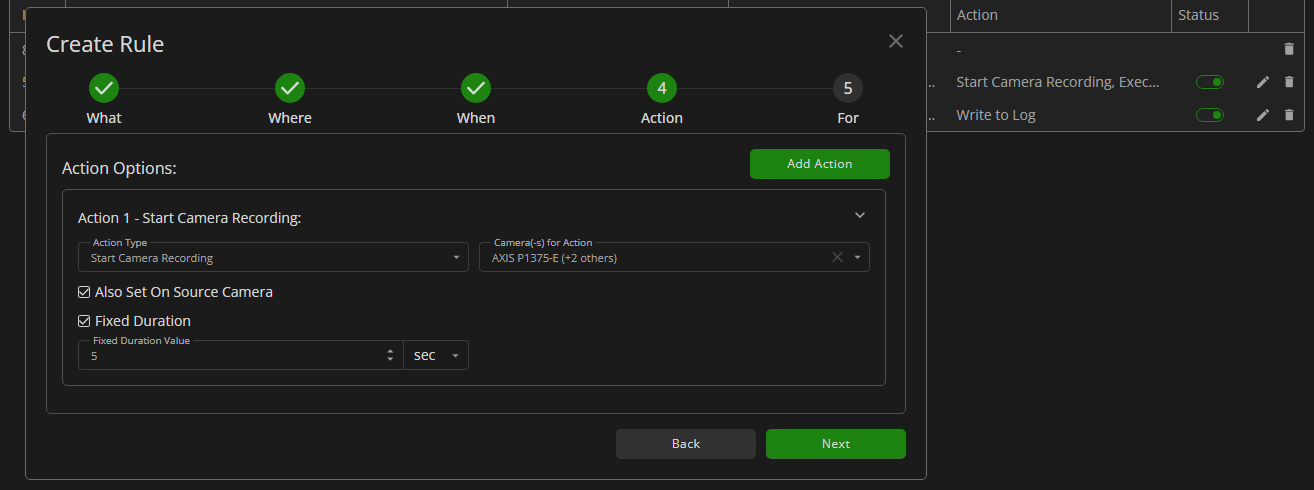
- Click the Camera(-s) for Action parameter to select at least one required camera in the Select Source pop-up window
- Check the Also Set On Source Camera checkbox to add the source camera to the camera selection list
- Enter the required value in seconds for the Pre-Recording and Post-Recording fields
- Check the Fixed Duration checkbox to enable fixed recording duration. In the activated fields:
- Enter the required recording duration value
- Select the value type from the drop-down list:
- Seconds
- Minutes
The Send HTTP Request action type allows to:
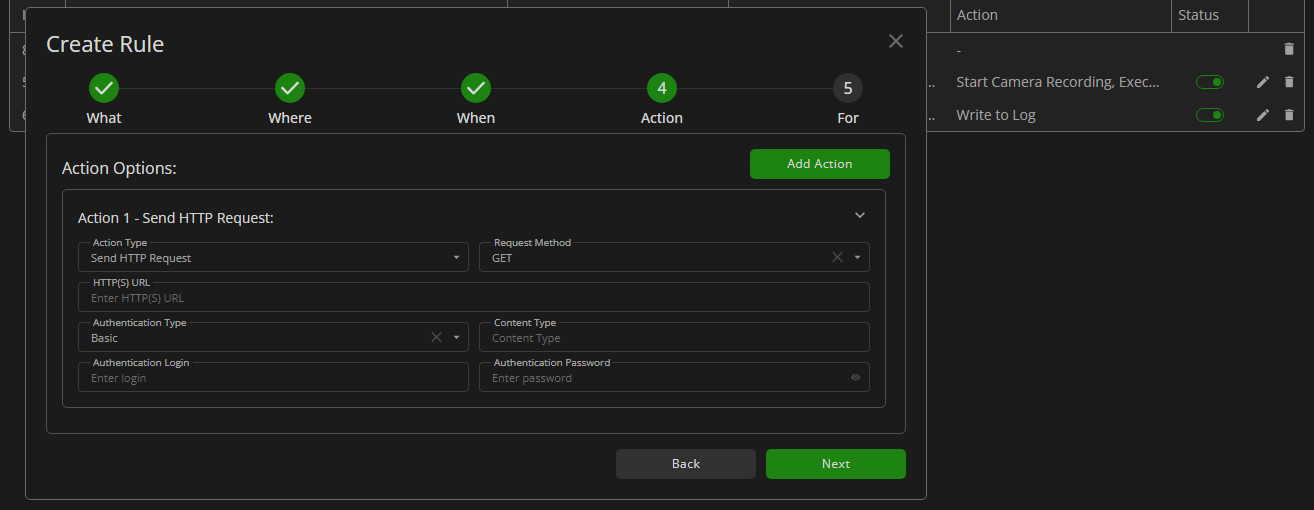
- Select the request method:
- Get
- Post
- Enter HTTP(S) URL (mandatory parameter)
- Select the content type (optional parameter) from the drop-down list:
- application/json
- application/x-www-form-urlencoded
- application/xml
- Select the authentication type from the drop-down list:
- None
- Basic
- Digest
- Enter login and password (optional parameters) for Basic and Digest authentication types
The Execute PTZ Preset action type allows to:
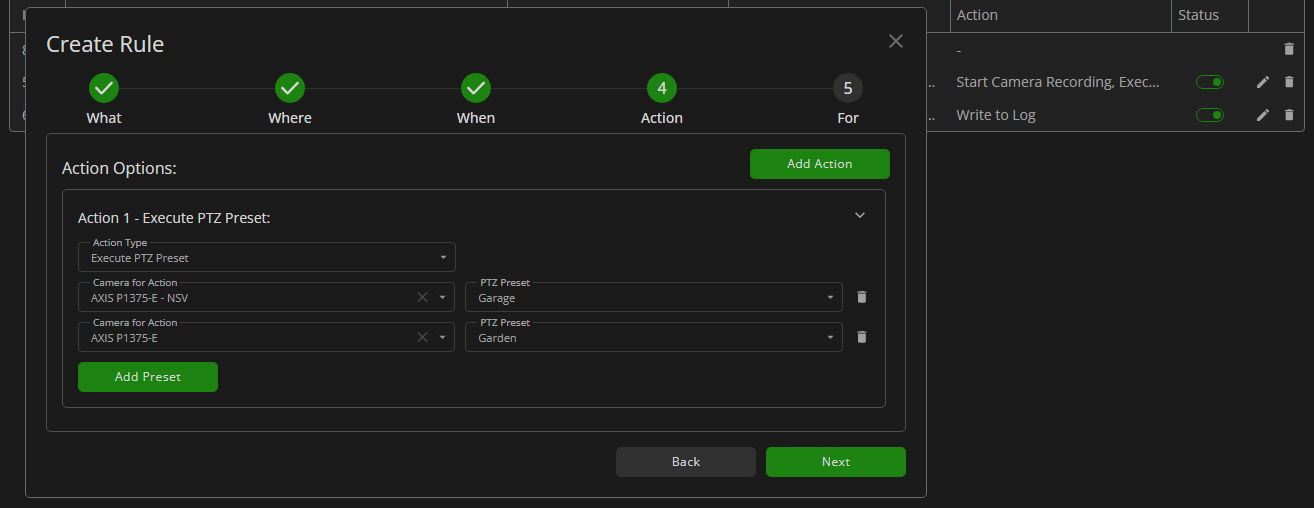
- Select the required camera from the Camera for Action drop-down list
- Select a customized PTZ preset from the drop-down list for the selected camera
- Click the Add Preset button to add another pair of Camera for Action/PTZ Preset parameters
- Click the Delete icon to remove the required pair of Camera for Action/PTZ Preset parameters
- The Add Preset button is enabled only if items in the first pair are selected.
- The Delete icon is available only if multiple pairs are added.
The Open Layout action type allows to:
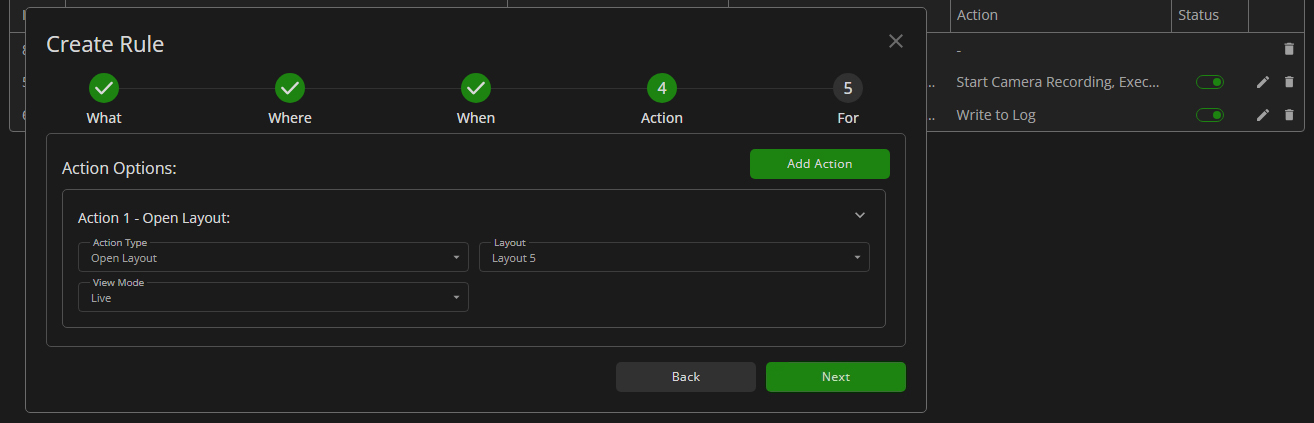
- Choose the layout created in Admin Center from the Layout drop-down list
- Select the view mode from the drop-down list:
- Live
- Playback
The Play Sound action type allows to:
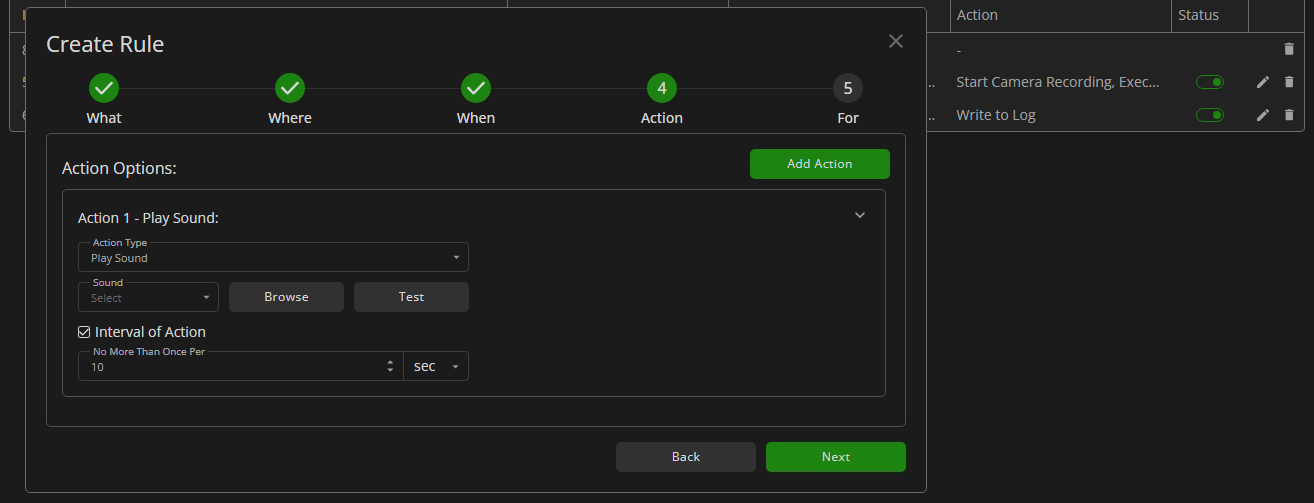
- Select the required sound:
- Open the Sound drop-down list and select the desired sound
- Click the Browse button to upload the sound from the computer
- Click the Test button to play the selected sound
- Check the Interval of Action checkbox to set a specific minimum interval between sound playbacks. In the activated fields:
- Enter the required minimum interval value
- Set the value type from the drop-down list (seconds, minutes)
The Create Bookmark action type allows to:
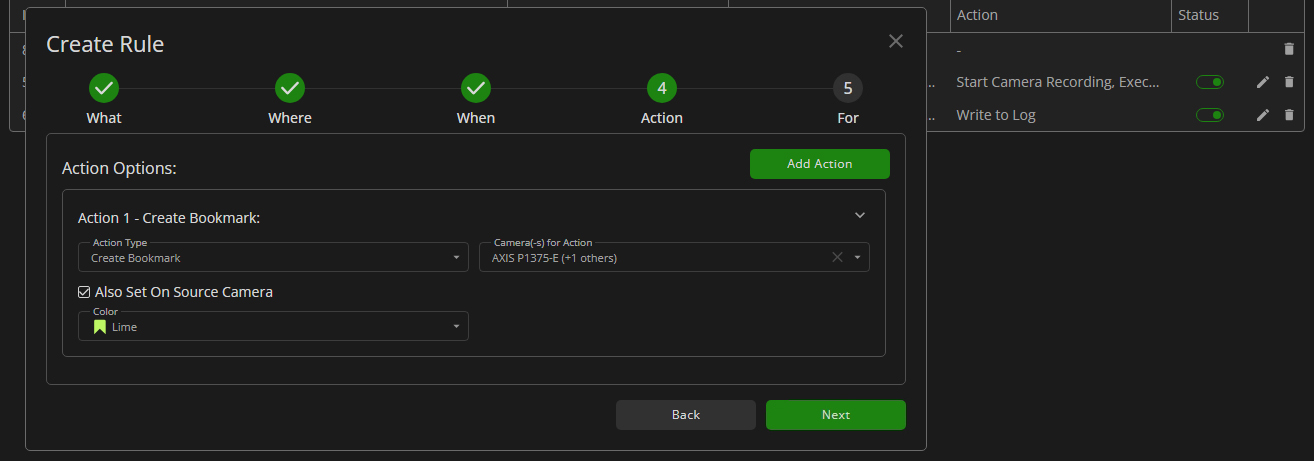
- Click the Camera(-s) for Action parameter to select at least one required camera in the Select Source pop-up window
- Check the Also Set On Source Camera checkbox to add the source camera to the camera selection list
- Select a bookmark color from the drop-down list:
- Red
- Yellow
- Lime
- Green
- Blue
The Create Alarm action type allows to:
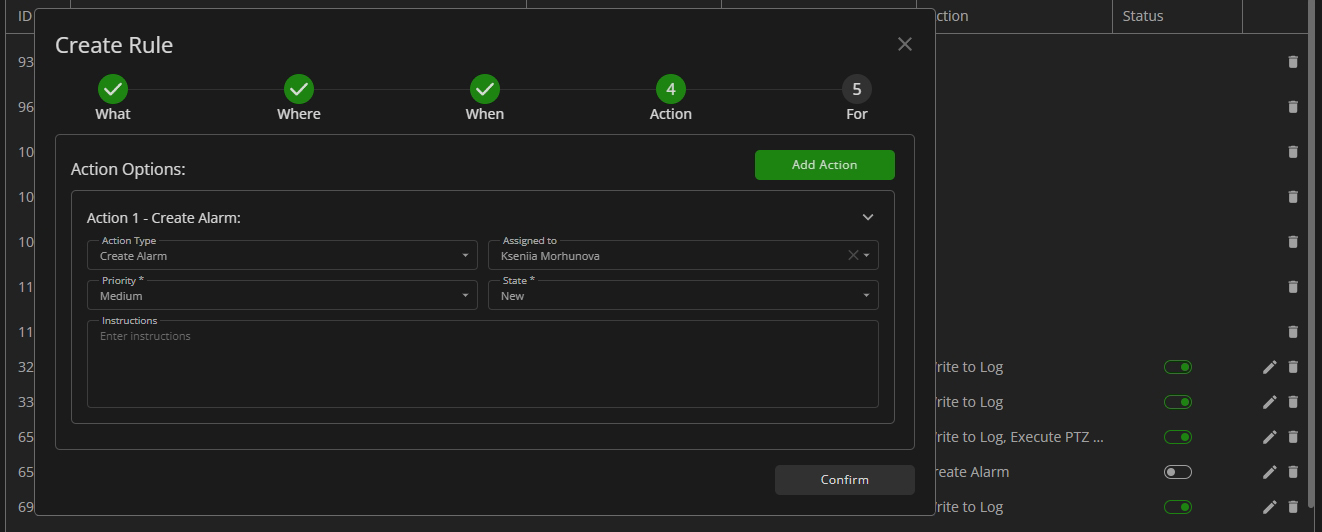
- Select a user from the drop-down list to assign them an alarm from this rule
- Choose the alarm priority from the drop-down list:
- Low
- Medium
- High
- Select the alarm state from the drop-down list:
- New
- In Progress
- On Hold
- Closed
- Write instructions for the user to whom an alarm will be assigned
The Generate Notification action type allows to:
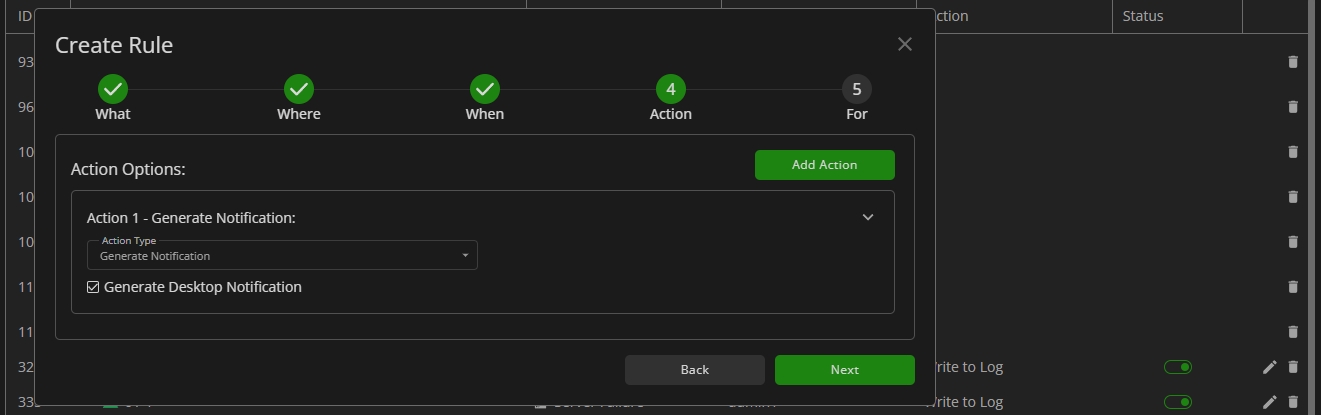
- Select the Generate Desktop Notification checkbox to receive pop-up notifications on your computer
- Receive notifications in the Notification Panel regardless of whether the Generate Desktop Notification checkbox is selected
The Trigger Output action type allows to:

- Click the Source parameter to select at least one required output in the Select Source pop-up window
- Set the State to apply to the selected output:
- Open
- Closed
- Enable the Return to Normal State checkbox to automatically revert the output to its normal state after a specified delay
- If enabled, enter the delay time in milliseconds to define the duration the selected output remains in the triggered state before it returns to normal
For Tab
Select the desired role in the For tab:
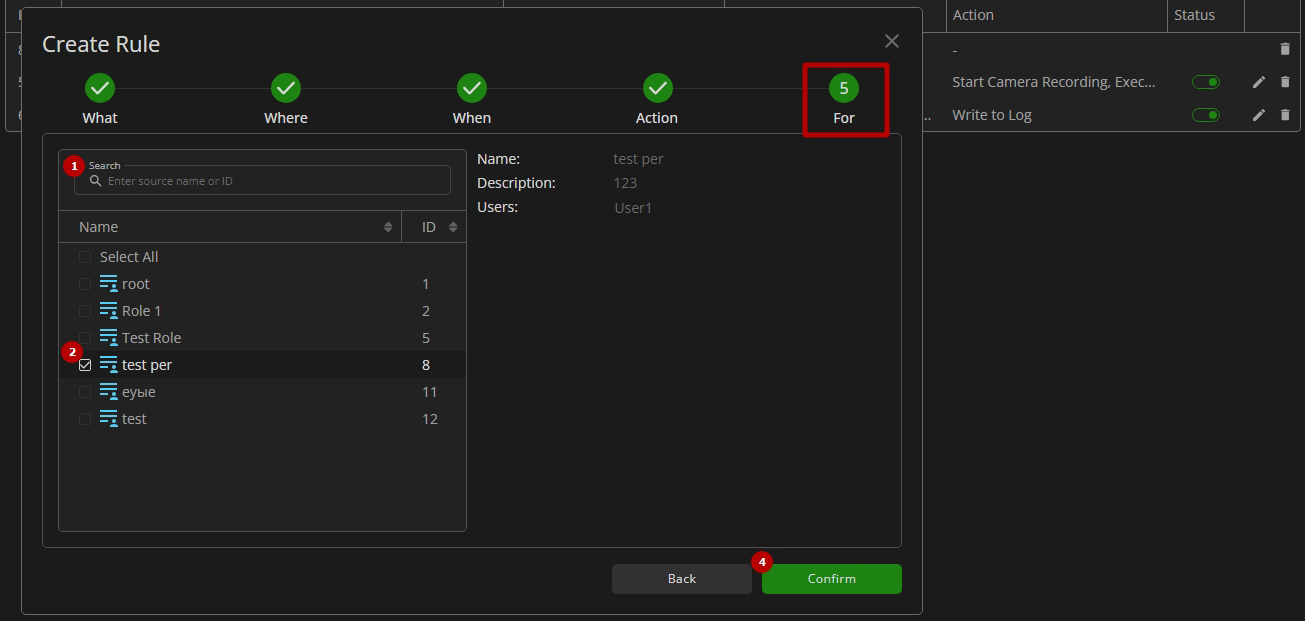
- Fill in the Search field with:
- Role name or characters in the name
- Role ID
- Select the checkboxes in the list to select the required roles
- Click the Confirm button to complete the rule creation process
- At least one role must be selected.
- The root role (ID 1) has to be selected to assign the alarm rule to Administrators. Do not select this role if Administrators should not be notified if the alarm rule executes.
Edit Rule
To edit the required rule parameters, click the Edit icon on the toolbox. In the Edit Rule pop-up window:
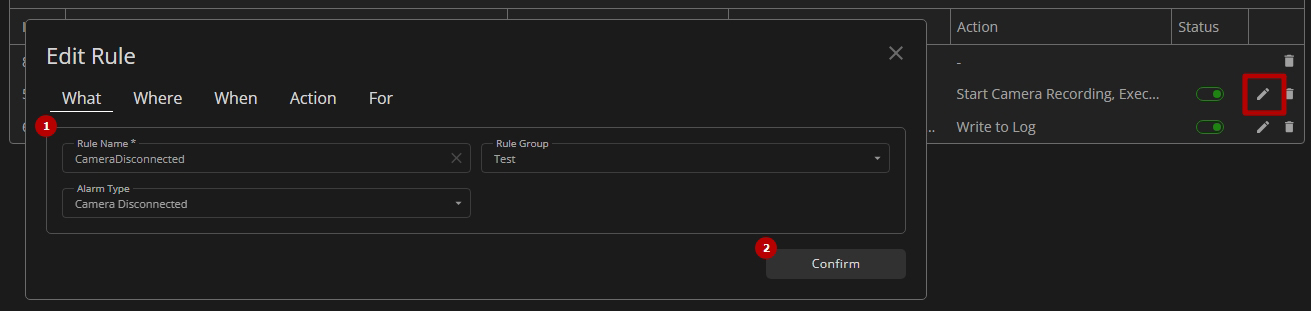
- Change parameters in the required tabs:
- What
- Where
- When
- Action
- For
- Select the Confirm button to apply changes
- The Where tab is disabled for the License Issue alarm type.
- The detailed parameter configuration process is described in the Create Rule section.
View Rule
To view the required rule details, double-click the row with the rule in the table:

Select the required tab to view the configured rule parameters:
- What
- Where
- When
- Action
- For
Delete Rule
To delete the rule:

- Select the Delete icon on the toolbox
- Confirm the intention in the pop-up window