Roles
Overview
To access roles, in the main menu:
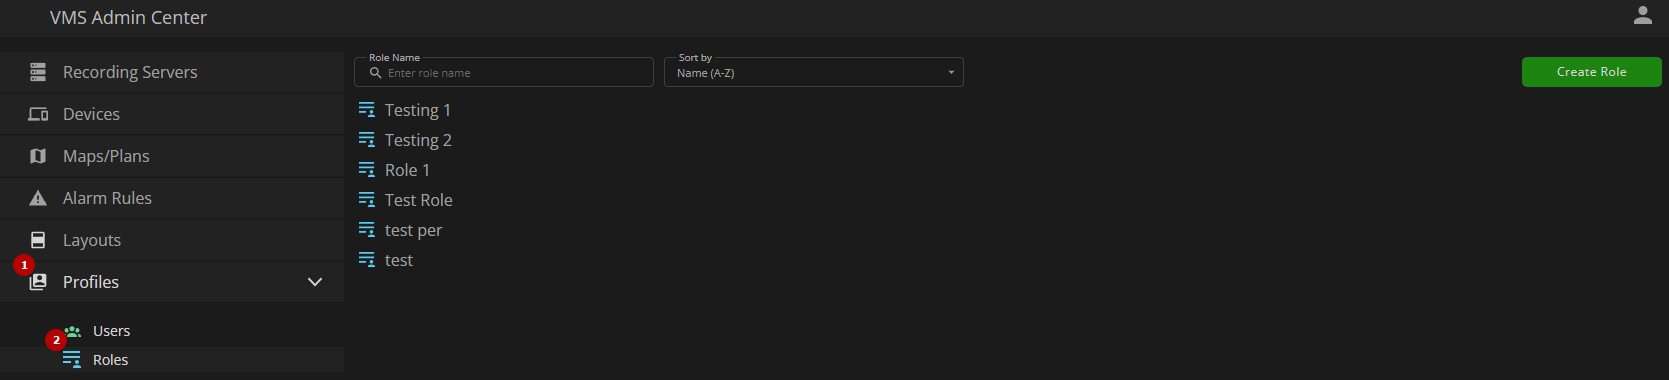
- Open the Profile section
- Select the Roles item
Use and Functionality
The Roles item shows the list of roles and parameters to configure access rights in each role separately. The item's functional menu allows to:

- Enter the role name or characters in the name in the Role Name search field to filter roles
- Sort roles by:
- Newest first
- Oldest first
- Name (A-Z)
- Name (Z-A)
- Create a new role
- Manage access rights in the role
- Delete the role
Create Role
To create a new role, click the Create Role button. In the Create Role pop-up window:
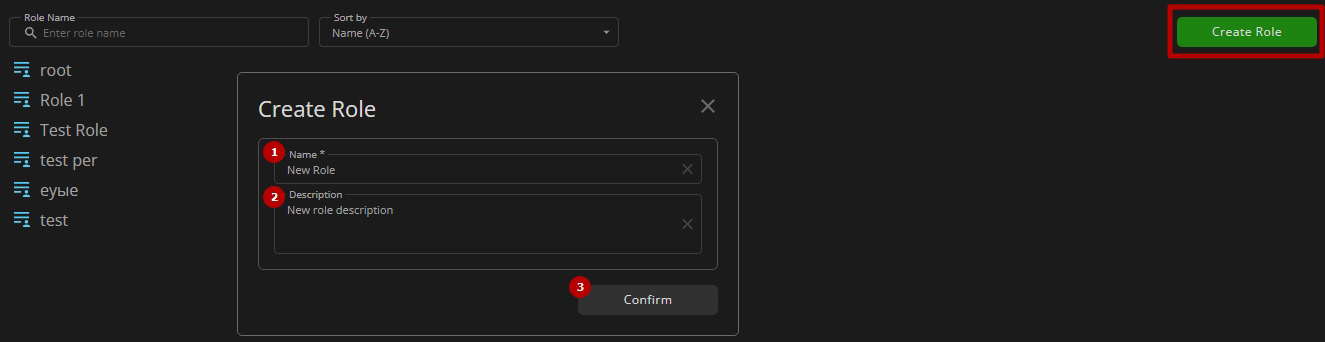
- Enter the role name
- Enter the role description
- Click the Confirm button to save the new role
Manage Access Rights
To configure the role settings, including user access rights, select the required role from the list. The role settings are organized into the following tabs:

- Info
- General
- Cameras
- Layouts
- Maps/Plans
- The root role with all enabled access rights includes only the Info tab.
- The switching between tabs is available by clicking on their names.
- The selected tab is always highlighted.
Info Tab
The Info tab allows viewing the general information about the role:

- View the role name and edit it by clicking the Edit icon
- View the role description and edit it by clicking the Edit icon
- View the list of users assigned the selected role
- The root role doesn't contain the Description parameter in the Info tab.
- The root role can not be renamed.
General Tab
The General tab allows selecting general permissions for different parts of the system:
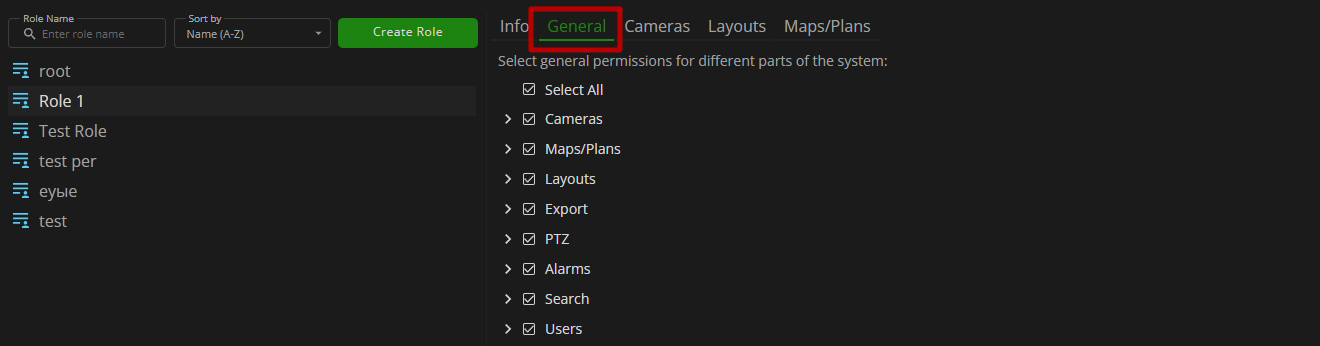
- Check the Select All box to automatically enable all permissions in the General tab
- Check the boxes next to the required permission category to enable all permissions within it
- Click the arrow next to the required category name to expand the list of permissions contained within it
- Check the required permission boxes to enable only desired permissions
Cameras Tab
The Cameras tab allows selecting permissions separately for each desired camera or camera group:
- In the left column, select the desired camera or camera group
- In the right column:
- Check the Select All box to automatically enable all permissions for the selected camera or camera group
- Check the Show box to enable the display of the camera in the system and the ability to manage it
- Check the boxes next to the required permission category to enable all permissions within it
- Click the arrow next to the required category name to expand the list of permissions contained within it
- Check the required permission boxes to enable only desired permissions
- The selected camera or camera group is highlighted with a green color in the list.
- To simultaneously select permissions for all cameras and their groups, click the Cameras root group name.
- To learn more about each access right in the Cameras tab, refer to the User Access Rights: Cameras Tab documentation.
Layouts Tab
The Layouts tab allows selecting permissions separately for each desired layout or group of layouts:
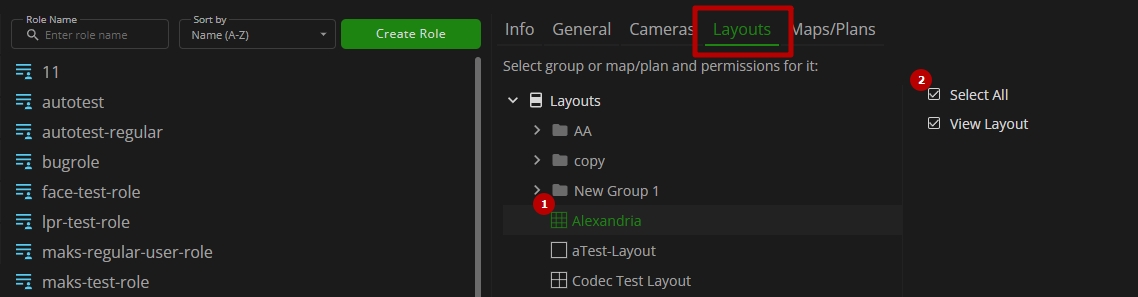
- In the left column, select the desired layout or group of layouts
- In the right column, check the View Layout permission box to enable this permission
- The selected layout or group of layouts is highlighted with a green color in the list.
- To simultaneously select permissions for all layouts and their groups, click the Layouts root group name.
- To learn more about each access right in the Layouts tab, refer to the User Access Rights: Layouts Tab documentation.
Maps/Plans Tab
The Maps/Plans tab allows selecting permissions separately for each desired map, plan, or group of maps and plans:
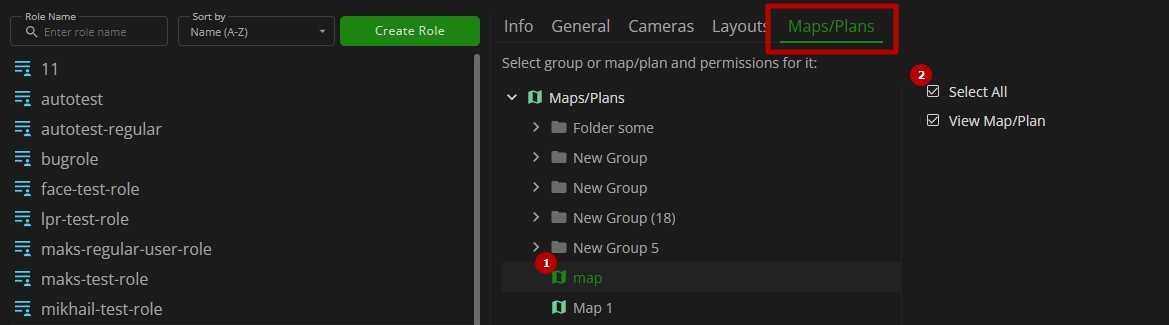
- In the left column, select the desired map, plan, or group of maps and plans
- In the right column, check the View Map/Plan permission box to enable this permission
- The selected map, plan, or group of maps and plans is highlighted with a green color in the list.
- To simultaneously select permissions for all maps/plans and their groups, click the Maps/Plans root group name.
- To learn more about each access right in the Maps/Plans tab, refer to the User Access Rights: Maps/Plans Tab documentation.
Delete Role
To delete the role:

- Right-click the desired role in the list
- Select the Delete option from the context menu
- Confirm the intention in the pop-up window