Users
This page describes the Users item that allows viewing and managing system users.
Overview
To access users, in the main menu:

- Open the Profile section
- Select the Users item
Use and Functionality
The Users item shows:
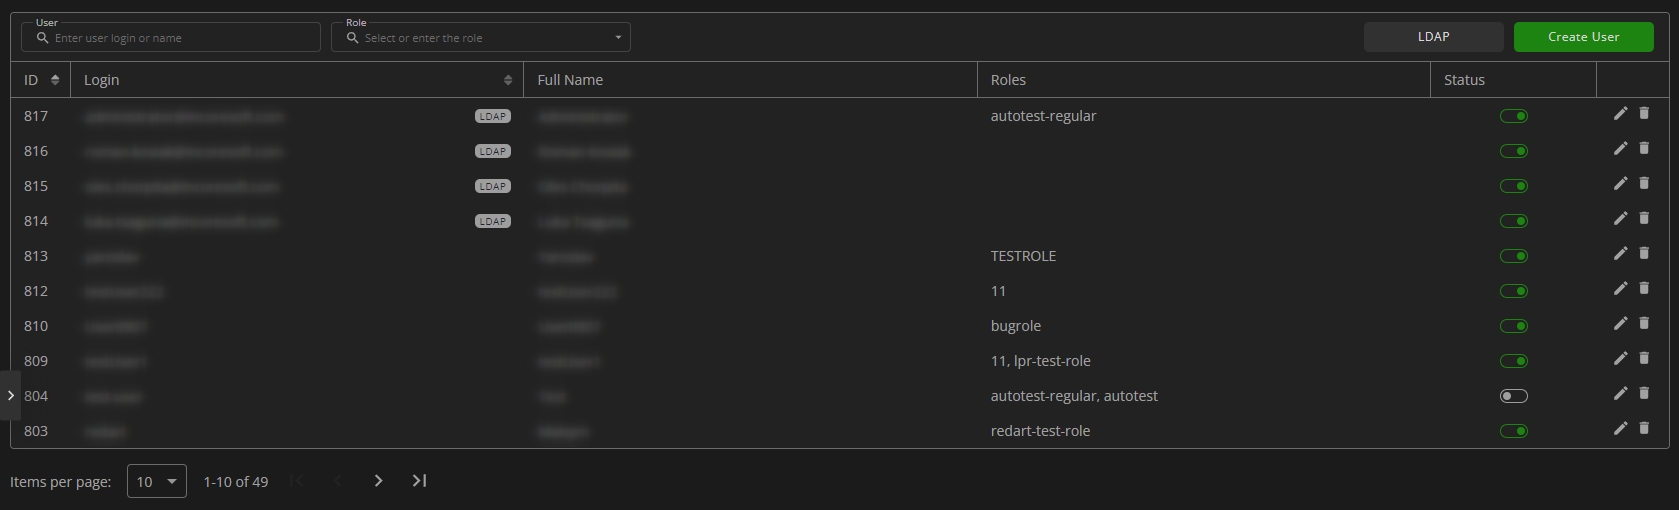
- Search filters to:
- Filter created users by login or name
- Filter users by the assigned role
- Table with created users comprises:
- User ID
- User's account login
- User full name
- Roles assigned to the user
- Status toggle to enable (green) or disable (gray) the user access to the system
- Toolbox comprises:
- Edit User option
- Delete User option
- Pagination menu to:
- Select the desired amount of items displayed in the table per page
- Switch pages by clicking the navigation arrows
Click the column headers for ID or Login in the table to sort the content by:
- User ID in ascending or descending order
- User's account login alphabetically from A to Z or Z to A
Fetch Users from LDAP
To fetch users from LDAP, click the LDAP button. In the Fetch Users from LDAP pop-up window follow these steps:
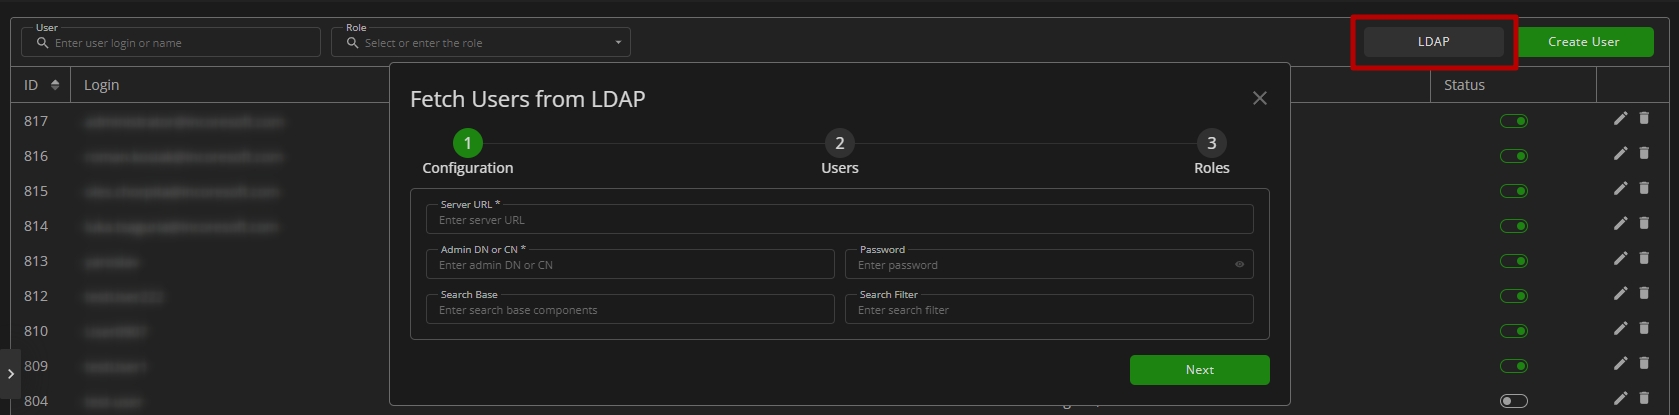
- In the Configuration block:
- Enter the server URL
- Enter Administrator's Distinguished Name (DN) or Common Name (CN)
- Enter the user's password
- Enter search base components
- Enter the search filter (optional parameter)
- Click the Next button to proceed
- In the Users block:
- Enter the user login or name in the Search field to filter users
- Select the checkboxes next to the required users
- Click the Next button to proceed
- In the Role block:
- Fill in the Search field with:
- Role name or characters in the name
- Role ID
- Select the checkboxes in the list to select the required roles for all new users fetched from LDAP
- Click the Confirm button
- Fill in the Search field with:
- For users fetched from LDAP, it is not possible to change the password during editing.
- A user fetched from LDAP is initially assigned a Regular user access level, which can be modified to Administrator during user editing.
Create User
To create a new user, click the Create User button. In the Create User pop-up window:
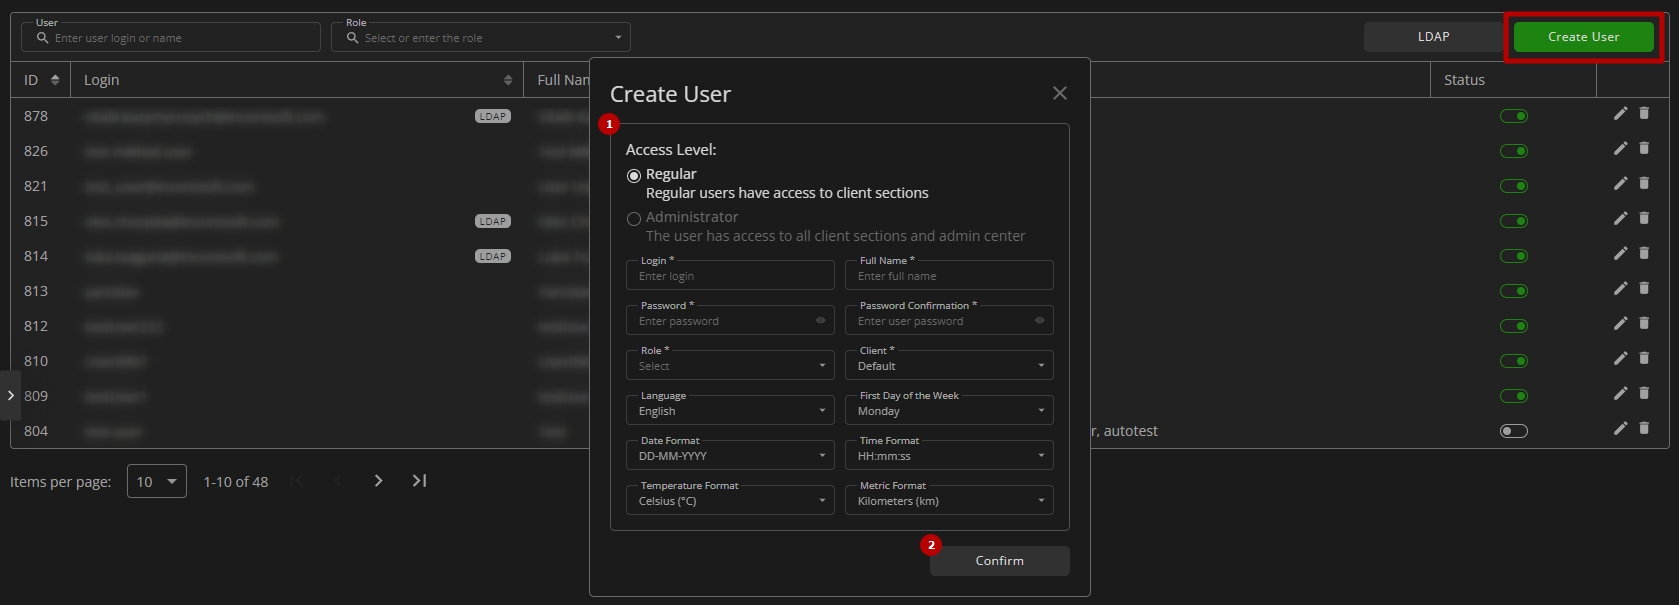
- Set user parameters:
- Select user access level:
- Regular, to access only client sections
- Administrator, to access all client sections and admin center
- Enter the username or email address in the Login field
- Enter the user's full name
- Enter the password for the new user's account and confirm it
- Select multiple required roles for the user from the drop-down list
- Select the client to which the new user belongs from the drop-down list
- Select the interface language from the drop-down list
- Select the first day of the week (Monday or Sunday) from the drop-down list
- Select the Date, Time, Temperature, and Metric formats from the drop-down lists
- Select user access level:
- Click the Confirm button to save the new user
- The user activity within the system and all user-generated data are inherently tied to their specific client. When moving a user to another client, all of the user's data up to this moment will remain with the original client where it was originally collected.
- The Role and Client fields are available only for Regular users.
- When a user is assigned multiple roles, any permission that is enabled in at least one role takes precedence. This means that if, for example, a user is assigned both Role 1 and Role 2, with the "View Cameras" permission enabled in Role 1 but disabled in Role 2, the user will have this permission enabled, considering all assigned roles. Additionally, when it comes to Schedule Settings, access is granted to the time slots defined in all roles assigned to the user.
Edit User
To edit the required user, click the Edit icon on the toolbox. In the Edit User pop-up window:
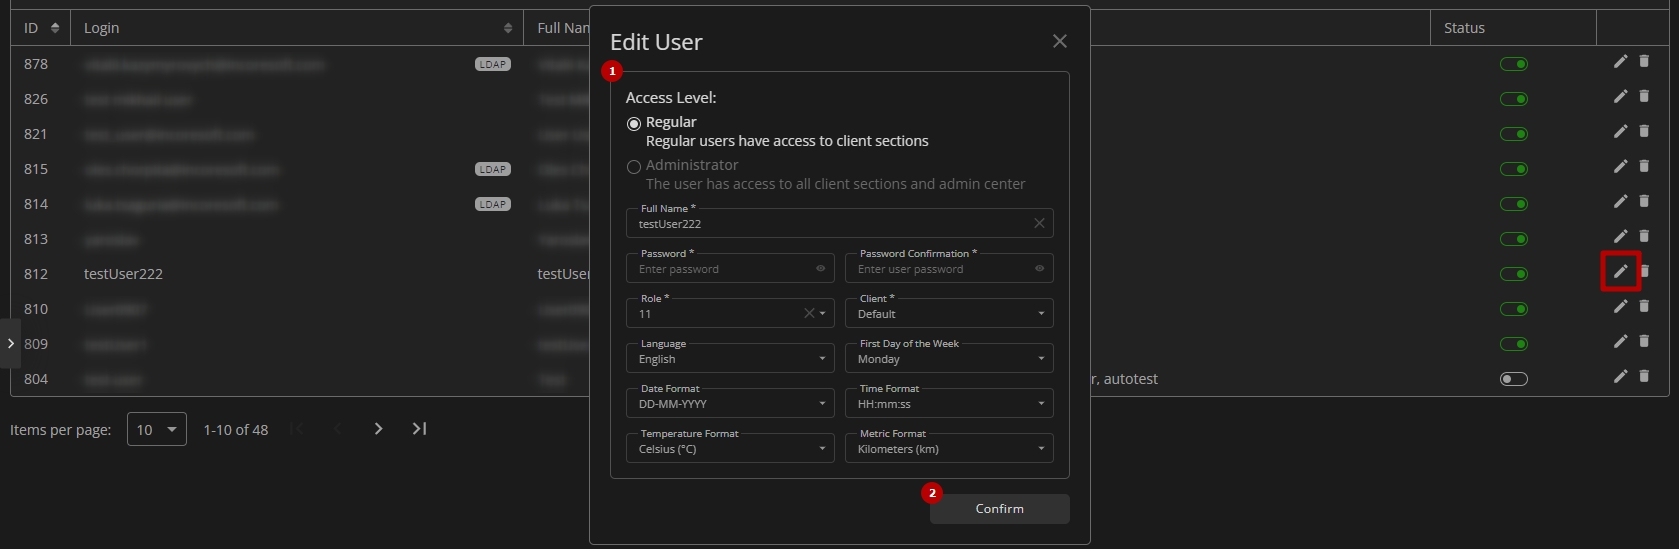
- Change the required parameters, except for the Login field
- Click the Confirm button to save changes
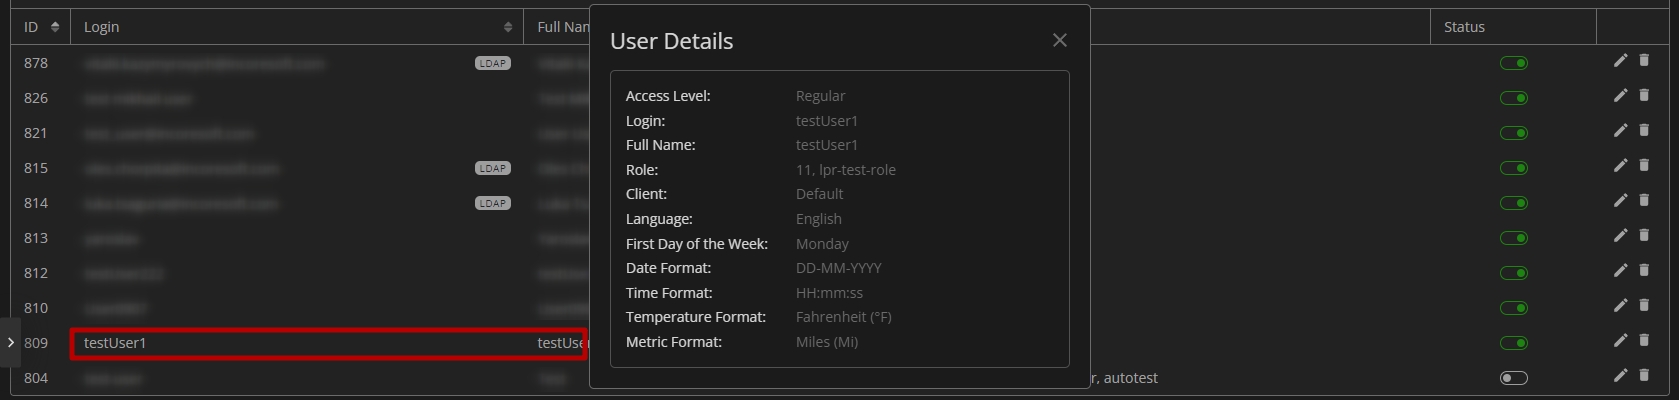
View User
To view the details of the required user, double-click the row with the user in the table:
Delete User
To delete the user:

- Select the Delete icon on the toolbox
- Confirm the intention in the pop-up window
A user cannot be deleted if there are alarms with the status New, In Progress, or On Hold assigned to them. Please reassign these alarms to another user before attempting to delete the specified user.