Search Tab
Overview
To access search results, on the Navigation Panel:

- Click the "+" button
- Select Search in the context menu
- See the Search tab
Use and Functionality
The Search tab interface comprises:
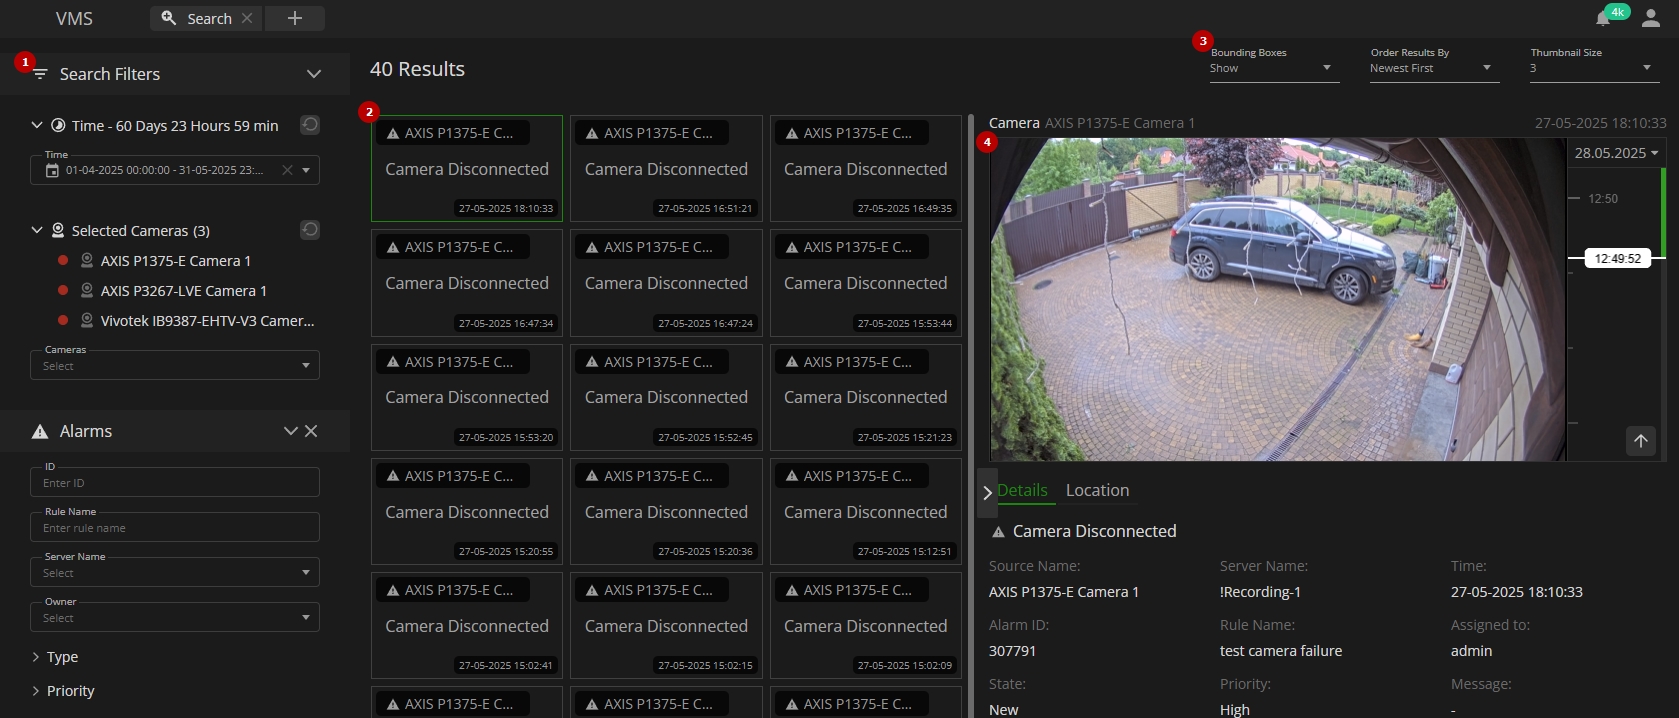
- Search filter panel for quick search results sorting
- Thumbnail grid displaying filtered search results with frames
- Additional parameters for customizing the search results grid view
- Block containing all the necessary search result details
Search Filters
The search filter panel allows to:
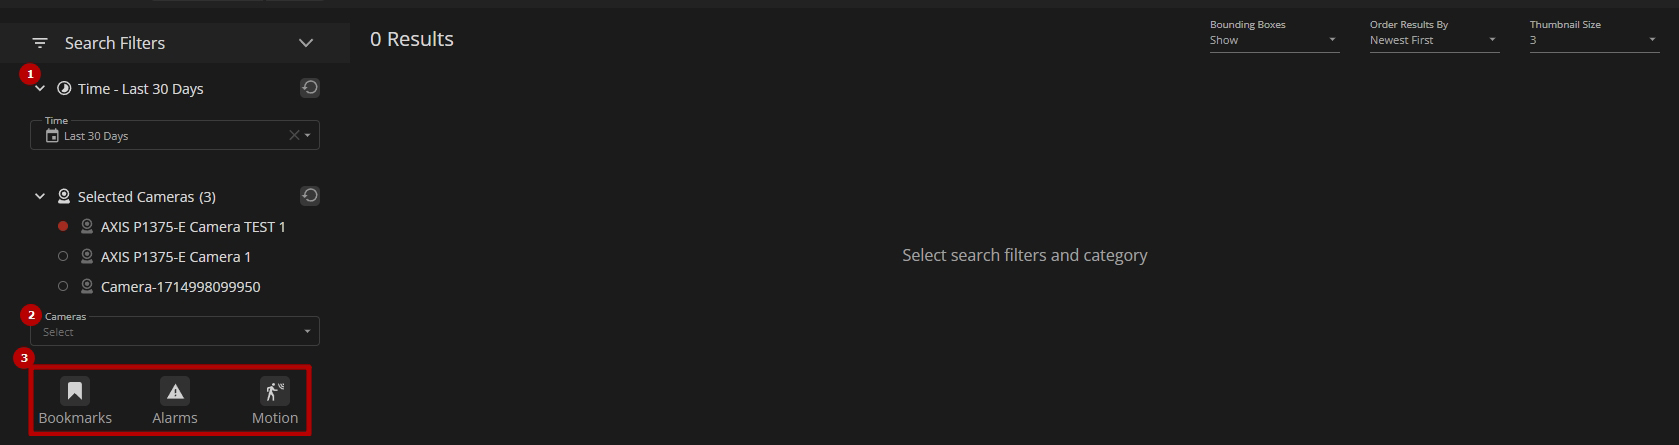
- Select the required time frame for the search results in the Time field
- Click the Cameras field to choose the required cameras. In the Select Cameras pop-up window:
- Fill in the Search field with the camera name or ID
- Select multiple required cameras from the list
- Click the Confirm button
- Select the search category:
- Bookmarks
- Alarms
- Motion
- To collapse or expand a filter block or section, click the Arrow icon next to its name.
- To clear filters, click the Reset icon next to the desired filters or entire sections.
- To close a section and cancel filtering by its specific filters, click the "x" icon.
The selected search category is displayed as a separate section with its specific filters. Only one category can be searched at a time. To change the search category, close the section of the currently selected category and choose another one.
Alarms Filters
The Alarms section allows to:
- Enter the alarm ID to filter alarms by a specific ID
- Enter the rule name to filter alarms by a specific rule
- Select multiple required servers from the drop-down list to filter alarms by a specific server
- Select multiple required users from the drop-down list to filter alarms by a specific alarm owner
- Check the required boxes in the Type block to filter alarms by a specific type:
- Generic Alarm
- Camera Disconnected
- License Issue
- Server Failure
- Server Started
- Check the required boxes in the Priority block to filter alarms by a desired priority:
- High
- Medium
- Low
- Check the required boxes in the State block to filter alarms by a desired state:
- New
- In Progress
- On Hold
- Closed
Bookmarks Filters
The Bookmarks section allows to:
- Check the My Bookmarks Only box to filter bookmarks created by the current user
- Enter the bookmark name or characters in the name to filter bookmarks by a specific name
- Enter the full bookmark description or characters in the description to filter bookmarks by a description text
- Select the required color in the Color block to search bookmarks by a specific bookmark color
Motion Filters
The Motion section allows the selection of the desired camera in the list. In the Motion Search pop-up window:
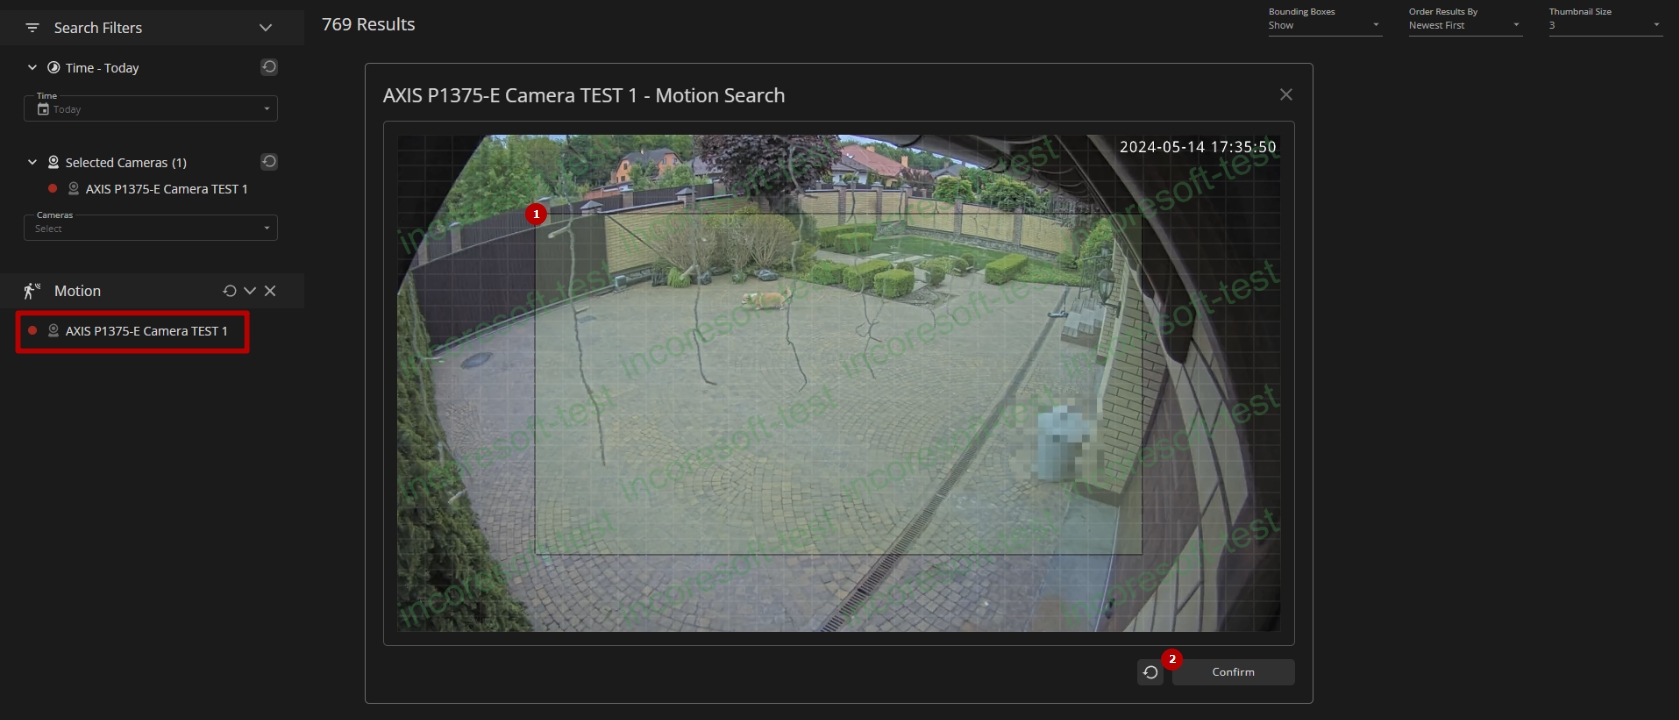
- Set the motion detection zone:
- Hold and drag the mouse cursor over the frame to set the zone borders
- Hold and drag the mouse cursor with pressed Ctrl on the keyboard to continue expanding the current zone in any desired directions
- Click the Confirm button to apply the motion search filter
Search Results
Search results are available for viewing in the thumbnail grid. The thumbnail grid allows to:
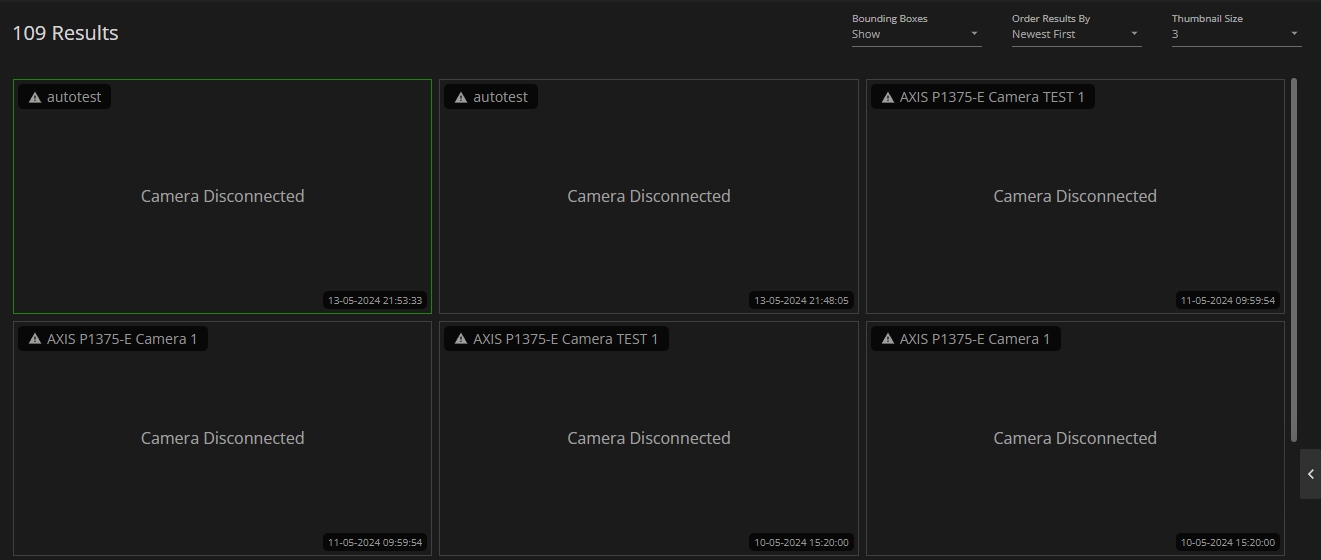
- View the frame preview, search result category and camera name, date, and time of each search result in the grid
- Click the required tile in the grid to view the search result details
To customize the thumbnail grid view, set the additional parameters as required:
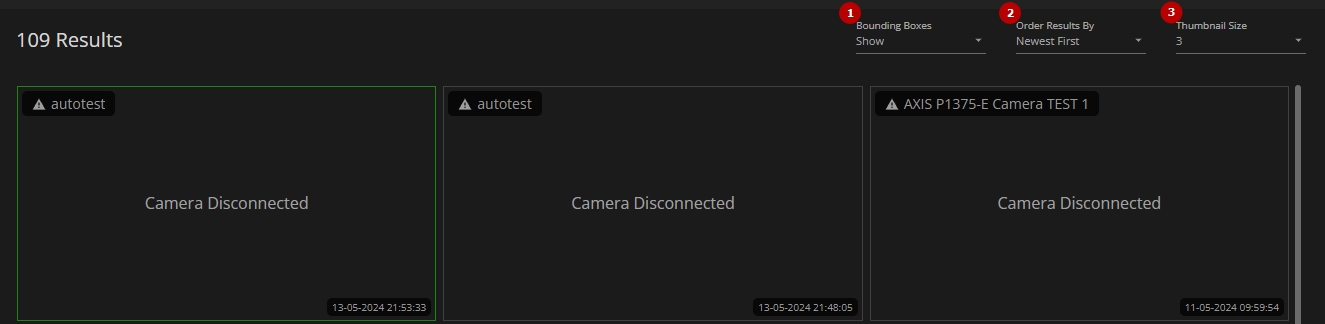
- Select the bounding box display mode from the drop-down list:
- Show
- Hide
- Choose the order of displaying the search results in the thumbnail grid from the drop-down list:
- Newest First
- Oldest First
- Select the desired number of tiles for each thumbnail grid row from the drop-down list; the possible range is from 1 to 8
Once the required search result is selected in the thumbnail grid, the extended information is displayed in the information block, allowing:
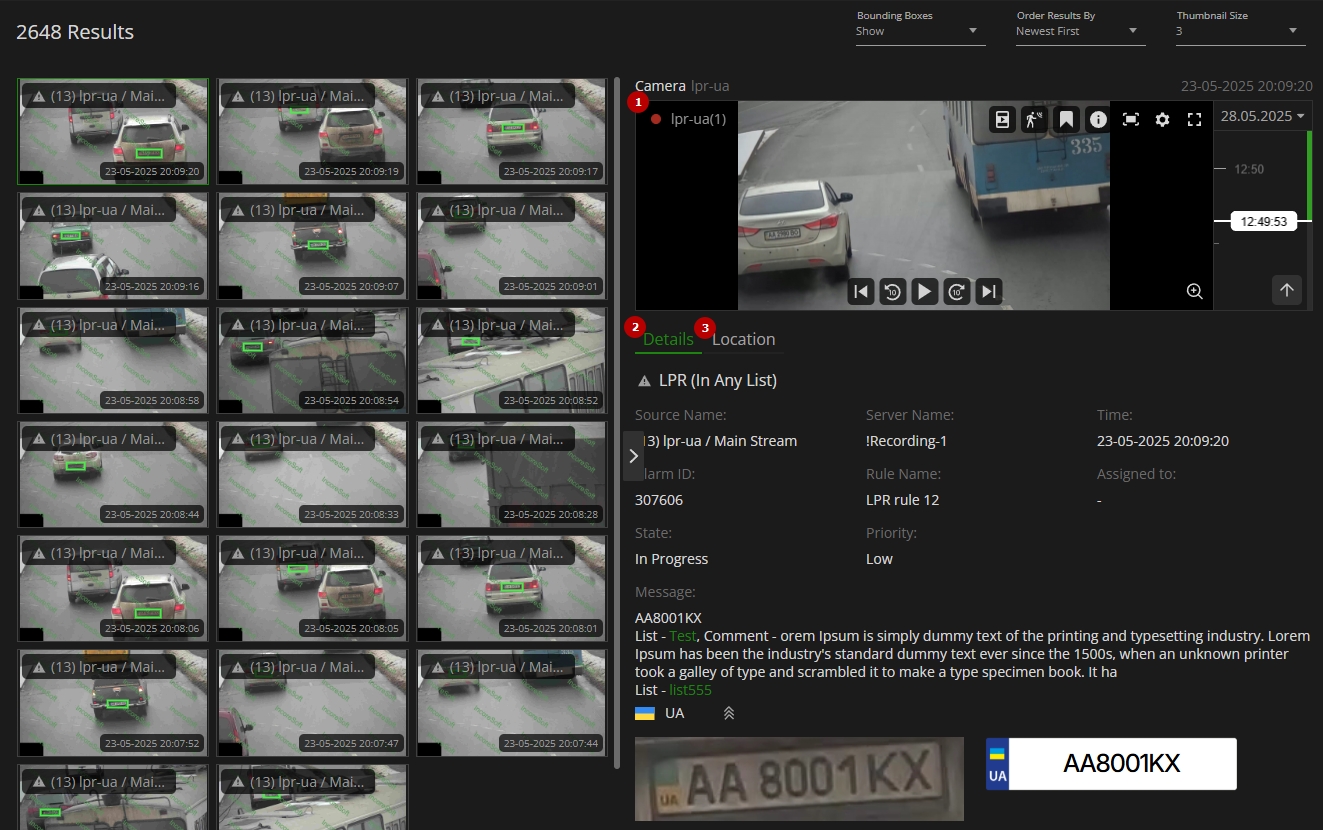
- Use video management tools to interact with the video fragment associated with the selected search result:
- Navigate through the recording using the playback controls below the video frame:
- Play or pause the video
- Skip forward or backward by 10 seconds
- Step forward or backward frame by frame
- Use the camera management tools available in the upper-right corner of the video frame:
- Show on Layout, to open the camera view in a separate tab on the navigation panel
- Motion
- Bookmark
- Information
- Snapshot
- Camera Settings
- Full Screen
- Click the Zoom icon below the video frame to:
- Zoom the frame in and out using the mouse wheel or the "+" and "-" buttons
- Move across the zoomed-in frame by holding and dragging it
- Use the timeline on the right of the video frame to browse through the video:
- Scroll the mouse wheel to zoom in or out on the timeline for more or less detail
- Click and drag the timeline to navigate earlier or later in the footage
- Click the date field at the top of the timeline to open a calendar and select a specific date
- Use the Go to Live button at the bottom of the timeline to jump to the real-time video stream
- Navigate through the recording using the playback controls below the video frame:
- See the search result details in the Details tab
- View the camera location on the map in the Location tab
- The information in the Details tab changes based on the selected search category in the filters: alarms, bookmarks, or motion.
- The View window and Location tab in the information block are available only for search results related to cameras. For other results, only the Details tab will be accessible.
- For detailed descriptions of all camera management tools, refer to the View Grid: Camera documentation.