LPR: Alarms
This page provides an overview of LPR alarms. The LPR alarms functionality allows viewing and managing alarms based on LPR Alarm Rules. To learn more about VMS alarms, refer to the Alarms section of the Client Panel documentation.
Overview
To access LPR alarms:
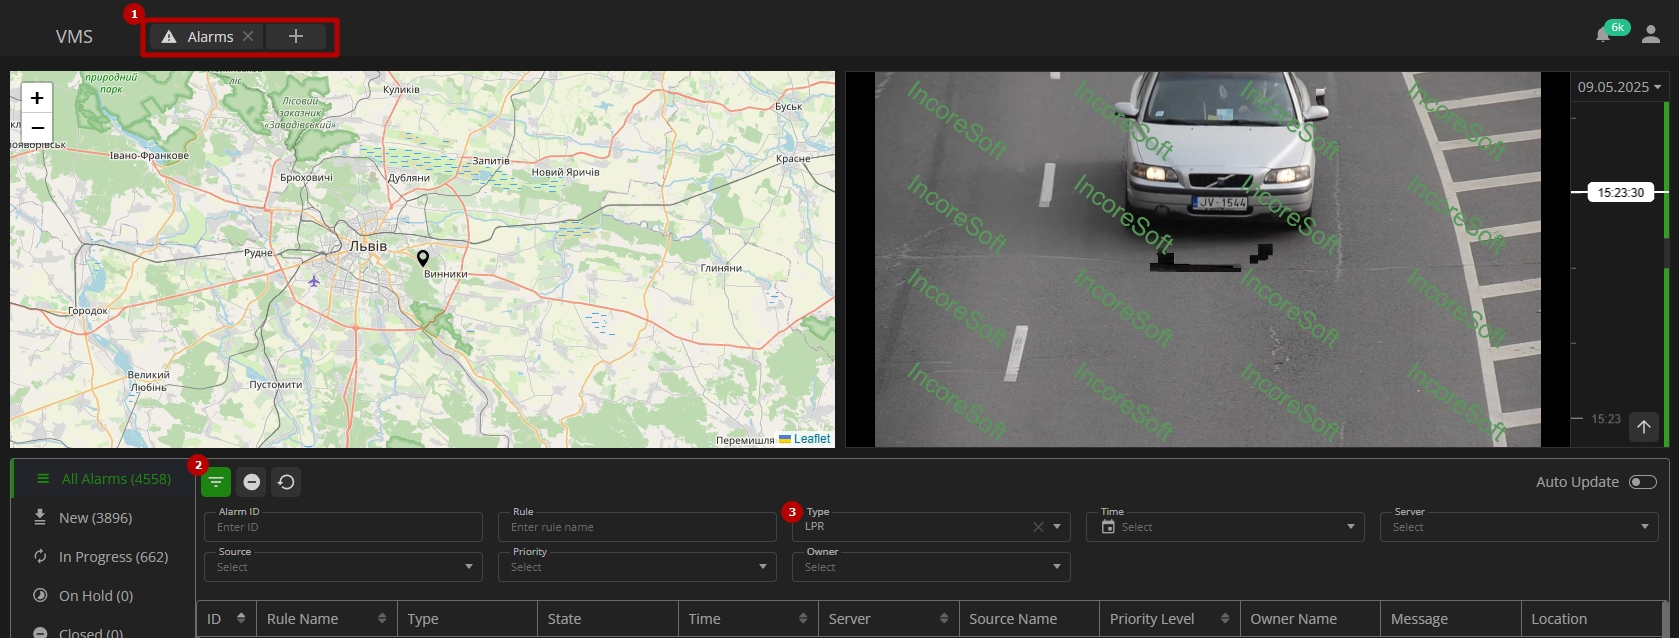
- Open the Alarms tab in the navigation panel
- Expand quick alarm filters
- Select LPR in the Type parameter
Use and Functionality
The LPR alarm functionality allows:
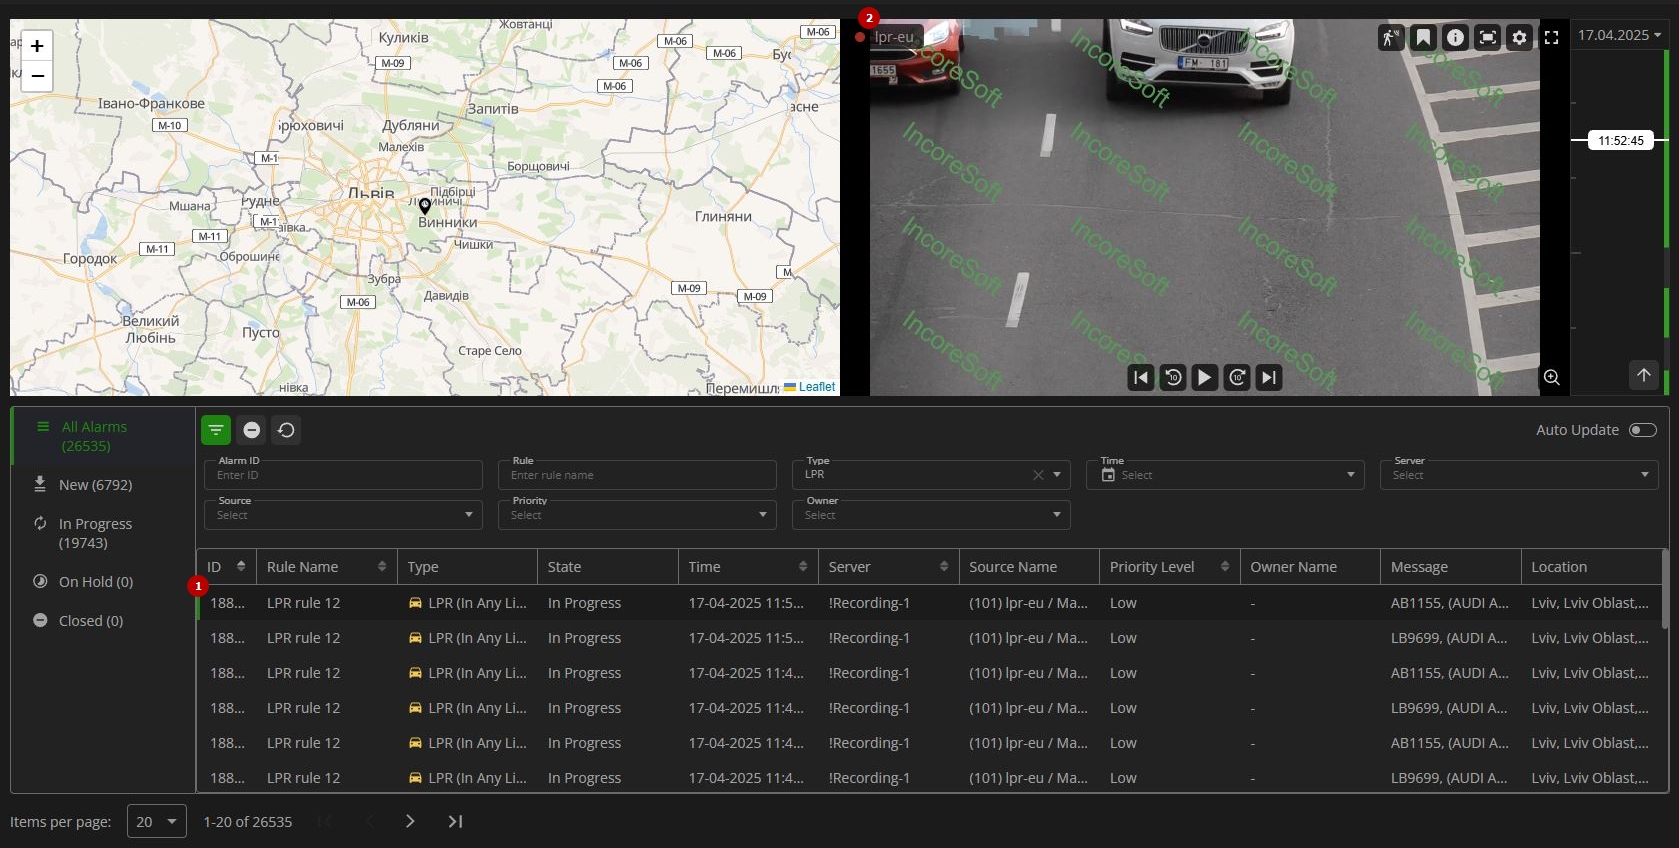
- View the list of LPR alarms in the table with the detailed alarm information
- Use video management tools to interact with the video fragment associated with the selected alarm:
- Navigate through the recording using the playback controls below the video frame:
- Play or pause the video
- Skip forward or backward by 10 seconds
- Step forward or backward frame by frame
- Use the camera management tools available in the upper-right corner of the video frame:
- Motion
- Bookmark
- Information
- Snapshot
- Camera Settings
- Full Screen
- Click the Zoom icon below the video frame to:
- Zoom the frame in and out using the mouse wheel or the "+" and "-" buttons
- Move across the zoomed-in frame by holding and dragging it
- Use the timeline on the right of the video frame to browse through the video:
- Scroll the mouse wheel to zoom in or out on the timeline for more or less detail
- Click and drag the timeline to navigate earlier or later in the footage
- Click the date field at the top of the timeline to open a calendar and select a specific date
- Use the Go to Live button at the bottom of the timeline to jump to the real-time video stream
- Navigate through the recording using the playback controls below the video frame:
For detailed descriptions of all camera management tools, refer to the View Grid: Camera documentation.
To view more details and manage the LPR alarm, double click the required alarm in the table. in the Alarm Details pop-up window:
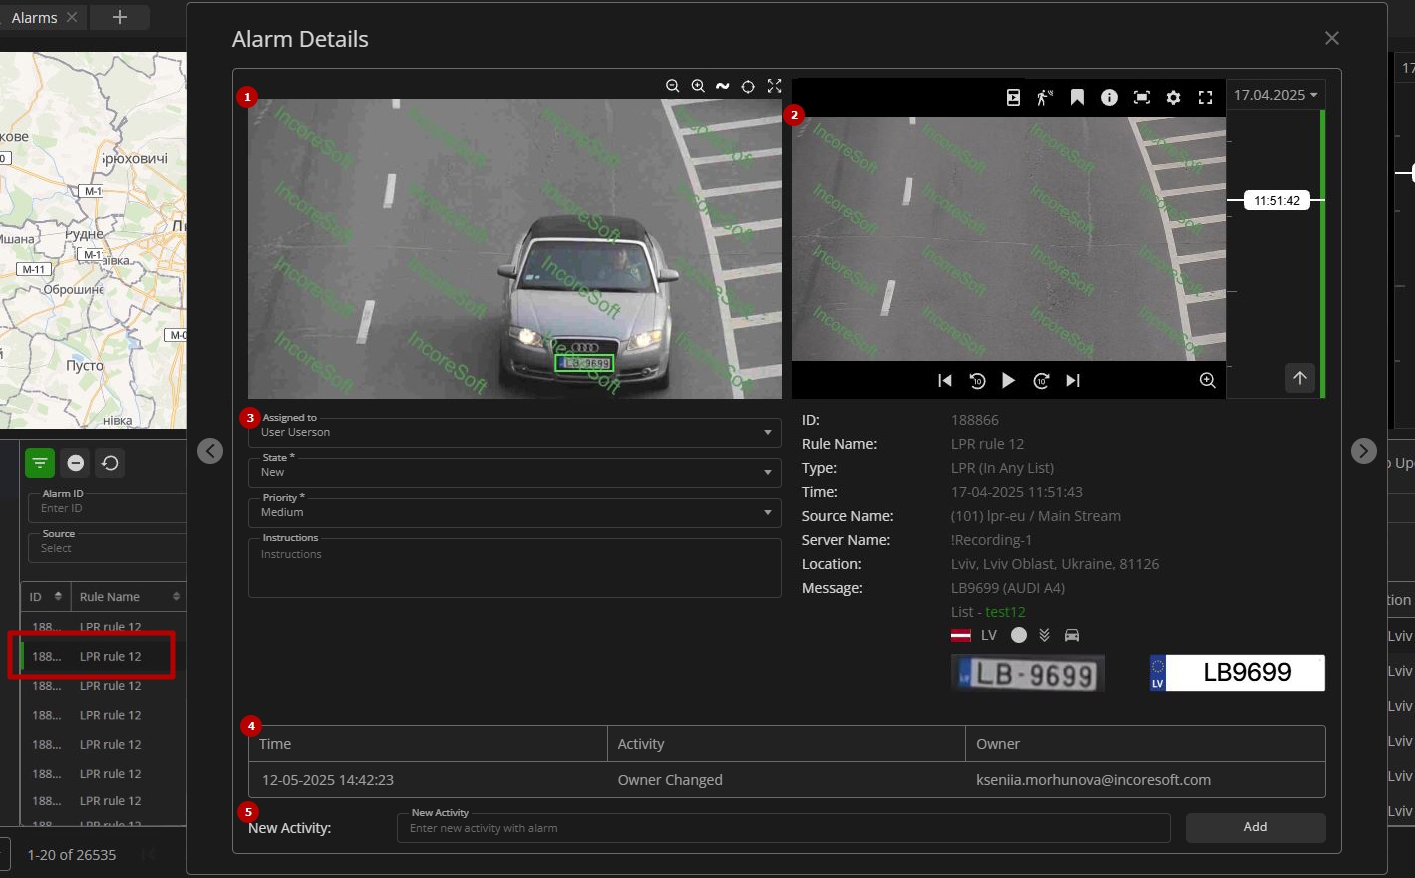
- View the frame of the LPR alarm from the camera
- View the recording of the video fragment associated with the LPR alarm and information about the alarm below it
- Manage the alarm capabilities:
- Assign the alarm to the required user from the drop-down list
- Select the state of the alarm from the drop-down list:
- New
- In Progress
- On Hold
- Closed
- Select the alarm priority level from the drop-down list:
- High
- Medium
- Low
- Enter the instructions for the user about recommended further actions
- View the table of the alarm history, which comprises:
- Date and time of the activity
- Activity description
- Name of the user, who performed the activity
- Add a new activity record for the alarm:
- Enter new alarm activity description
- Click the Add button to add the record to the table
"<" and ">" arrow buttons at the pop-up window's sides allow switching between alarms.